Creating Contacts
In CRM, you can create contacts by:
- Entering data in the contact details form: You can manually fill in the Contact details gathered from various external sources.
- Importing contacts from external source: You can gather data through various sources, e.g. purchasing contacts database, contacts from different business units, etc. and import the CSV and XLS files into CRM.
- Capturing contacts from website: You can create web forms and allow website visitors to submit their contact details or questions directly through forms. These details submitted in the website are captured directly into the Contacts module.
- Converting lead to contact: On lead conversion, contacts, accounts and potentials can be created.
- Synchronizing Microsoft Outlook contacts: You can synchronize the contacts in Microsoft Outlook with the contacts in CRM.
Note
- Some of the standard fields may not be visible or editable depending on your organization business process.
- In case you want to add or modify fields or would like to know more details on the usage of fields, please contact your System Administrator.
Create Contact Individually
You can create contacts individually by:
- Filling in the details in the contact creation form.
- Cloning the contacts with a few changes in the existing contact details.
To create contacts individually
- In the Contacts module, click New Contact.
- In the Create Contact page, enter the contact details. (Refer to the Standard Fields)
- Click Save.
Note
- By default, the person who creates the contact owns it.
- To change owner, click the Change link in the Contact Owner field from the Contact Details page and select another user.
- While selecting the Account from the Lookup field's pop window, there is also an option to create an Account.
You can use this option to quickly create an account by providing some mandatory information. You have two options:- Click Save. The record will be saved and it will be listed with the other accounts. You can select it to associate to the contact that you were creating.
- Click Save & Associate to save the new record and also associate it to the contact that you were creating.
To clone contacts
- In the Contacts tab, click a particular contact that you want to be cloned.
- In the Contact Details page, click Clone.
- In the Clone Contact page, modify the required details. (Refer to the Standard Fields)
- Click Save.
Associate Contact with other Records
You can create a 360-degree view of the contact to display all the associated details, such as potentials, trouble tickets, open activities, history of the completed activities, attachments, and notes.
In the Contact Details page, you can update the following:
- Member Accounts: To add other divisions or subsidiaries to the parent account
- Open Activities: To add tasks and events
- Closed Activities: To display all the closed tasks and events
- Cases: To create cases for the contact
- Products: To add products for the contact
- Attachments: To attach documents and notes
- Notes: To attach notes to the contact.
- Potentials: To add potentials to the account
- Contacts: To add contacts to the account
- Sales Orders: To add sales orders to the account
- Invoices: To add invoices to the account
- Quotes: To add quotes
- Campaigns: To associate many campaigns to a single contact
- Social Interactions - To view the Twitter and Facebook interactions associated to the contact and send messages, like posts, retweet, etc.
Setting up Assignment Rules
Assignment rules help you automatically assign the records to users in CRM. The assignment rule is applicable only for the leads, contacts, cases and records in custom modules that are imported or the ones that are captured through web forms. Based on the organization-wide record distribution process or round-robin process, you can automatically assign owner to the records.
Availability
![]() Permission Required: Manage [Module] Assignment Rules permission in profile.
Permission Required: Manage [Module] Assignment Rules permission in profile.
Record Assignment Workflow
- Create an assignment rule and associate rule entries to the rule.
- Select the required assignment rule in the lead/contact/case import tool or web form.
- While importing records, first the record is evaluated based on the assignment rule criteria and then assigned to the Zoho CRM user.
Limitations
- You can associate up to 25 different criteria in each rule entry.
- Though you set multiple rules, users can select only one rule at a time.
- Assignment rules can be used for the records generated through import tool and Web-to-form only.
- You cannot assign leads/contacts to users if you are creating them manually.
To set up an assignment rule
- Click Setup > Automation > Assignment Rules.
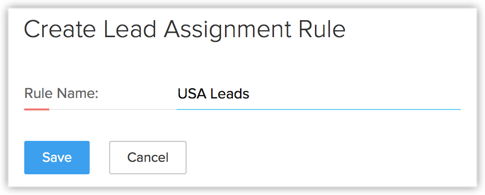
- In the Assignment Rule page, select a Module from the drop-down list and click Create Rule.
- In the New Rule page, enter the Rule Name.
- Click Save.
- In the [Module] Assignment Rule page, click Create Rule Entry.
- In the Rule Entry page, do the following:
- Criteria: Enter criteria for the rule entry.
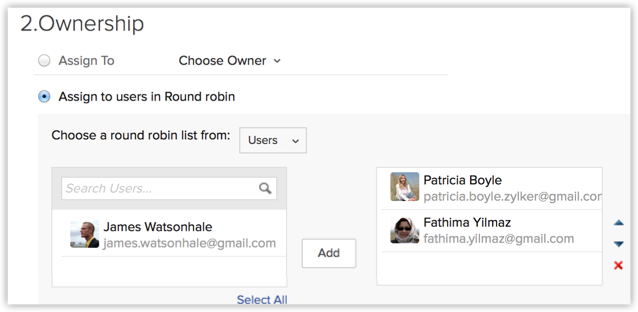
Record Owner: Choose one of the options to assign owner to the record.- Assign To: Select the user who should be assigned as the owner of the records.
- Assign to users in Round robin: Select Users, Roles or Groups from the drop-down list. Records will be assigned to the list of selected users.
- Workflow Task: Select the workflow task to be assigned. See Also Workflow Tasks
- Click Setup > Automation > Assignment Rules
- Click Save.
Example of the Distribution Logic
One record per round is assigned to each user
When records are imported or generated through web forms, they are assigned to the users as per the order in which they are listed. The following options are available to select a list of users:
- Users - Select the users to whom the records need to be assigned. You can rearrange the order in which the users are listed.
- Role - Choose a role. The users with the selected role will be listed. The order in which the users are listed is based on the date they were added. The recently added users will be listed first.
- Group - Choose a group. The users in the selected group will be listed. The order in which the users are listed is based on the date they were added. The recently added users will be listed first.
The users are listed in the following order in the Rule Entry
- Jasmine Frank
- Manish Patel
- Charles Stone
- Nathan Brooks
The system will distribute records to users in the following order:
- Jasmine Frank - Record 1
- Manish Patel - Record - 2
- Charles Stone - Record 3
- Nathan Brooks - Record 4
- Jasmine Frank - Record 5
- Manish Patel - Record 6 and so on.
Related Articles
Contacts
Email marketing provides a crisp and simple approach to manage your contacts which are the basic substratum for your email marketing. In this user guide, you’ll learn how to import contacts and create mailing lists. You’ll also learn how to manage ...Contacts
Contacts are the people with whom the organization can communicate for an account. A single account can have multiple contact points. You can enter every minute details about the contact. Also, you can easy import your complete database of contacts ...Contacts
Working with Contacts Contacts are people with whom you communicate, either in pursuit of a business opportunity or for personal reasons. In Business-to-Consumer (B2C) scenarios, contact is the most important information for acquiring customers, ...Creating Leads
In CRM, you can create leads by: Entering data in the lead details form: You can manually fill in the Lead details gathered from various external sources, e.g. trade shows, exhibitions, colleagues, business cards, etc. Importing leads from external ...Creating Profile
While creating a profile, first you have to associate the existing profile to the new profile and later you can change the modules and field-level access control. The table below provides information on the default profiles and the additional ...