Custom Functions
You can set up custom functions in three steps:
- Create a custom function.
- Associate custom function to a workflow rule.
- Test custom functions integration.
To create a custom function
- Click Setup > Automation > Workflow > Custom Function.
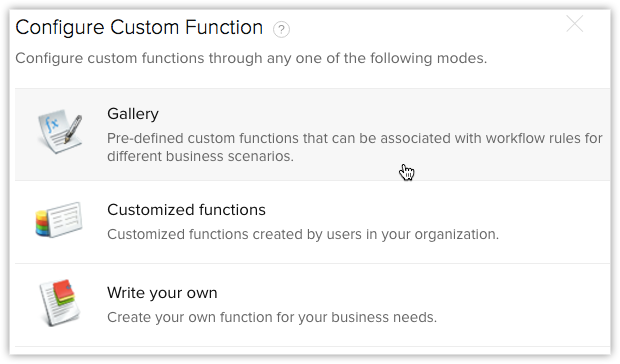
- In the Custom Functions page, click the Configure Custom Function.
- In the Configure Custom Function page, select a function from Gallery, existing function or write a new one using Deluge Script.

- Click Save.
To associate custom function to a workflow rule
- Click Setup > Automation > Workflow Rules.
- In the Workflow Rules page, click the Create a Workflow Rule.
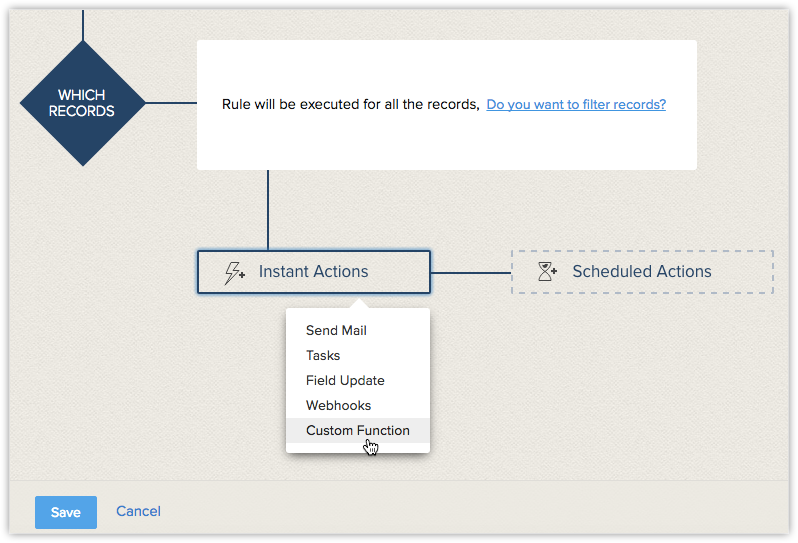
- In the Workflow Rule page, specify workflow rule parameters.
- Under Workflow Actions, select the custom function to be triggered.
- Click Save.

To test the custom function integration
- Add test data in CRM according to your workflow rule criteria.
- Check for the data received from CRM via custom function, in your application.
- Modify your custom function code in CRM, if there data is not received or a data mismatch
- Continue this test until you obtain the required data from CRM to your Application.
Important Notes
- You can associate up to 6 (1 Instant Action and 5 Time-Based Actions) custom functions per workflow rule.
- You can transfer data for a maximum of 10 CRM fields from CRM to third-party applications using custom function.
- You can retrieve data from other Apps to CRM using custom function.
- You must update the API ticket regularly according to limits in third-party applications.
- You will not receive any email notification, if the custom function integration stopped functioning due to any issue in a third-party API.
- If there is any failure while connecting to Creator service, custom function will send the second notification after 15 min. Thereafter, the system will not send any notifications for that particular workflow trigger. Errors returned from Creator are shown under Reason for Failures section.
- If you exceed the maximum count per day, the system will not send remaining custom function notifications to third-party applications and will notify the failure to Administrator.
- CRM will the send the data in following standard format for Date and Date Time fields to third-party applications:
- Date: yyyy-MM-dd
- Date Time: yyyy-MM-dd hh:mm
- Limits for Custom Functions:
- Calls per Day - 10000 calls/day or 200 calls per user license for the org. (whichever is lower)
- Integration Tasks - 25000 Zoho API calls/day using deluge.
- Get Data - 25000 calls/day
- Post Data - 2 calls/day
- Send Email - 1000 emails/day
Related Articles
Custom Fields
For almost all of the fields that you create, you need to specify the following: Label: Specify a name for the field. Field Properties: Specify properties of the field such as description, field values and so on. Other specifications required for ...Custom Buttons
To create a custom button Go to Setup > Customization > Links & Buttons. In the Links & Buttons page, click Create New Button. In the Create Your Button page, do the following: Choose the module where you want to create a custom button. For easy ...Create Custom Slide Show
To create a custom show: To create a new custom show Click on Slide Show on the main menu bar. Navigate to Custom Shows. Select Create New from the drop-down. In the New Custom Show dialog box, name the custom show. Select one or more slides from ...How can I add a custom section?
You can add a custom section under the Main Content Area in the Customer Portal. To create a new section, do the following: Log into Helpdesk Click Setup>Customer Portal>Home Page Customization Click Add New Section under Main Content Area In the ...How to change the default custom view in a module's home page?
The modules in CRM have a default custom view. For example, when you click on the Leads tab, you may see the records listed under My Leads list view. You can change this view and set the default view as All Open Leads. To change the list view, do the ...