Customizing Document Styles
Change Document Style
Writer allows you to customize your own themes and setup documents as per your requirement. Using Custom Styles, you can customize the the styles for the headings and the body text and even save them with as templates to use it in future. For example, if you have a Legal document with all the specific styles defined for all the heading and the body text, and you wanted this formatting to be applied for all the legal documents you can use Writer, and save the style-set under the name 'Legal' and use it later in all your legal documents.
The styles can be defined either by selecting a chunk of text containing the required formatting and assigning the style to a particular heading/ body-text or defining the style in the custom-styles dialog itself that exposes all the possible formatting available for the heading/body-text.
To customize a Heading style:
Method 1:
- Select the text that contains the required formatting
- Right-click the selected text and click Text Styles > Heading > Update Heading 1 to match selection.
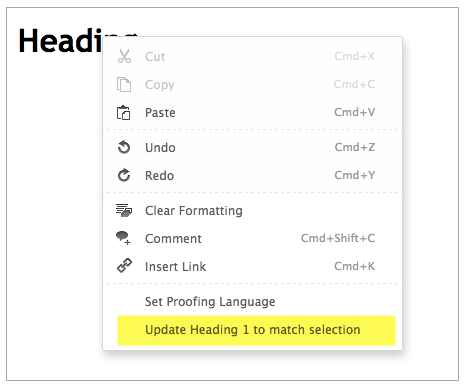
Note:
- After you have updated the heading style, all the corresponding headings in the document automatically changes to the latest heading style.
Method 2:
- In the Format tab, under the Document section, click the Style
 icon and then click View/Edit Current Document Styles.
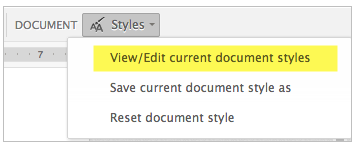
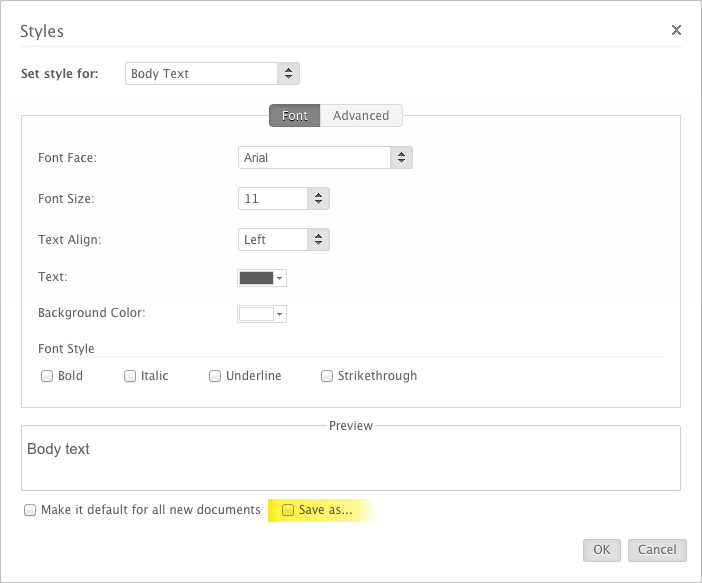
- Click required formatting from the dialog and click OK. Check-out the advance tab too (as indicated below) for more options.
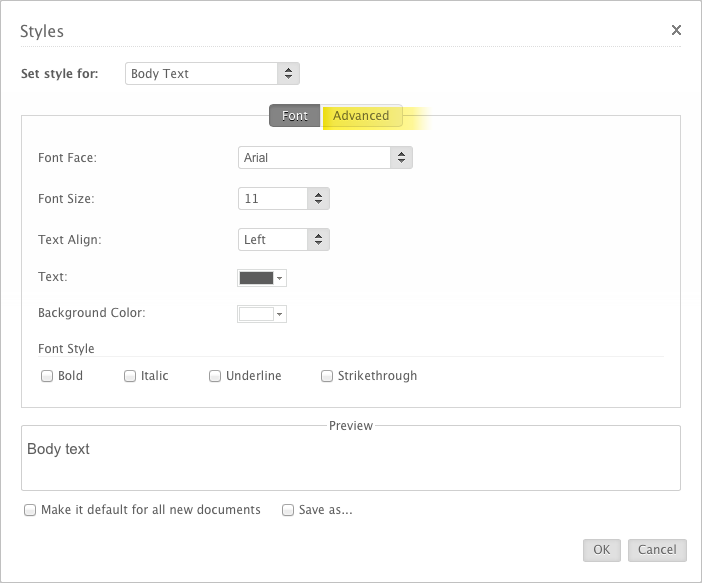
To customize a Body text style:
- The procedure to customize the body text is same as the customizing a Heading Style.
- Select a text with the formatting and right-click on the selected text.
- Click Update Body Text to Match Selection
-Or-
Edit the style from the Custom Style dialog box.
To save the styles:
After you have set the styles, you can save it the following two ways.
Method 1
- In the Format tab, click the Styles
 icon and click Save Current Document Style As option.
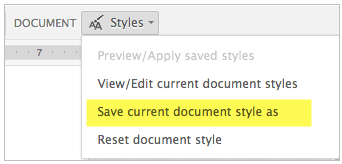
-Or-
Click the Customize Style icon and then click View/Edit current document styles. The Styles dialog box is displayed. Click Save As.
Method 2
- Choose the saved styles from toolbar, and click Custom Styles Icon>Preview/Apply Saved Styles to apply them on the document.
- If you wish to make the current document style as your default style, in the Custom Style window, click Make it default for all new documents.
Add and Remove Style
You can apply existing styles to the document or reset the styles at any point of time.
To add styles:
- In the Format tab, click the Styles
 drop-down list, and then click Save Document style as.
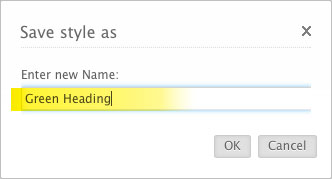
 - Enter new name for the style and click Ok. The document style set will be added to the list of styles.
To remove styles:
- In the Format tab, click the Style
 drop-down list, and then click Reset document style.
 - The applied style from the document will be removed.
Related Articles
Customizing Notification e-mails.
You can customize the Notification e-mails sent to your customers and Support agents in Helpdesk. To edit a template, follow the steps mentioned below: Go to Setup>Automation>Notification Rules In the following page, hover your mouse on a ...Customizing my Email Marketing
Header & Footer Customization Customize the look and feel of your header and footer details. You can add, or edit the following content: View in Browser: This is the banner which helps to open the email in a separate browser tab/window. Update ...Customizing your button appearance
Click "Settings". In the Web Embed section, click the name of the embed you want to customize. In the "Button Appearance" section, click "Change the Appearance". This will display all the options for customizing the chat button. Make your changes and ...Customizing languages in the Web Embed
Web embed picks the default visitor browser language. Changing the browser language will change the languages in your embeds. SalesIQ supports eighteen languages in embeds. French German Spanish Dutch Norwegian Turkish Russian Portuguese Italian ...Document Management
1. Check-In / Check-Out Control Docs provides a check-in/check-out feature that allows only one person to work on the document at one time. The Check-in/Check-out function, is very helpful in a collaborative environment as it prevents team members ...