Import Data
To import data
- Click the [Module] tab.
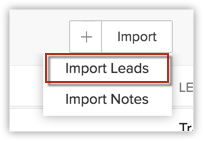
Module refers to the tabs like Leads, Clients, Accounts, etc. - In the [Module] Home page, click Import [ Module ].
- In the Import [Module] page do the following:
- Choose Import My [Records] or Import My Organization [Records].
- Browse to locate and select the required file that is to be imported.
- Select the check box to Enable Manual Lead approval.
The records will be manually approved by the admin before being assigned to specific users. This option is available only while importing leads.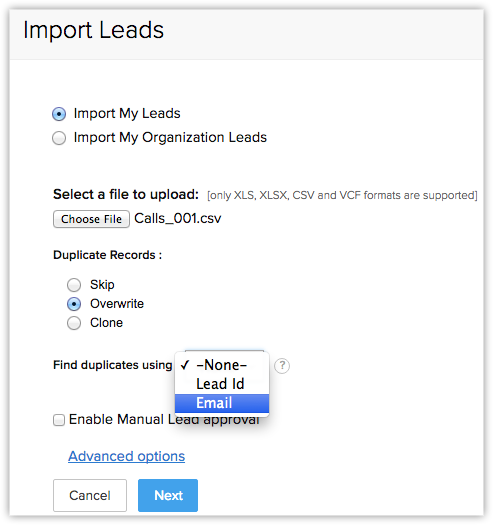
- Select Skip, Overwrite or Clone for duplicate records. (Refer notes below)
The skip and overwrite option is available only in the Paid Editions.
- Choose a field from the Find duplicates using pick list field. (Refer notes below)
The field you choose here will be used by Client management system to compare the existing records with those in the import file. On identifying matching records, Client management system will reject, overwrite or duplicate the records based on your choice. - Under Advanced Options, do the following:
- Select the Character Encoding from the list.
- Select a Workflow Task, if required.
Note, that the work flow task will be available in the list only if you had already created a work flow task.

- Choose the Date and Time format for the date and time values in the import file.
- Select a rule from the drop-down list to Assign [Record] Owner as per the Assignment Rule. This option is available only when you Import Organization's record.
Based on the rule, records will be assigned to the users. With assignment rules you can implement the Round Robin method to assign records to the users. - Select an option from the list to Assign all imported Leads to this Lead Source.
This option is available only while importing leads. - Click Next to continue.
- In the Map Fields section, do the following:
- Associate the fields in CSV/XLS file column header with the corresponding [Module] fields in Client management system
(Mandatory fields should be properly mapped) - Click Next to continue.
- Associate the fields in CSV/XLS file column header with the corresponding [Module] fields in Client management system
- In the Confirm Mapping section, verify whether all fields are mapped correctly.
- Click Import.
When the process is over, the added, updated and skipped records will be listed for your reference.
Related Articles
Import Data
Use the Import My [Records] feature to import the records owned by (assigned to) you. By default, the records' ownership is automatically assigned to the user who imports the records. Use Import My Organization [Module] feature to import all the ...What are the things I need to check before I import data?
Before you import you data, it is recommended that you test your import with a sample file. Please go through the ckecklist to make sure you import your data properly. Related Link Import Data to CRMExport Data
The Export Data feature allows you to export data (in CSV format) from individual CRM modules. After exporting the data, you can further validate or store the data in your own server(s). Note Module refers to the different tabs. For example, Leads, ...Import Limits
If the import file is in XLS, XLSX or VCF format, you can import a maximum of 1500 records/batch. Records more than 1500 can be imported in CSV format. Check the Feature Availability table for Import Limits. Note The supported formats are Excel (XLS, ...Creating Data Sharing Rules
This feature helps you to create rules to provide access or restrict users from viewing your data in various modules. Availability Profile Permission Required: Users with the Manage Data Sharing permission can access this feature. To create data ...