Managing Groups
Group Members
You can manage groups with the following combinations:
- Users: Only users.
- Roles: All users associated with the Roles can become members of the groups.
- Roles & Subordinates: All users associated with the roles and subordinate roles can become members of the groups.
- Sub-groups: All users belonging to a particular group can become members of the new group.
Sample Groups
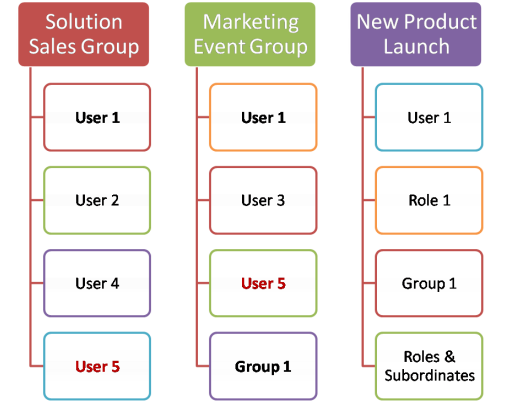
In Client management system - Groups module, you can perform the following operations:
- Create Groups
- Assign users to groups
- Edit groups
- View groups
- Delete groups
- Share records with groups
Create Groups
You can create different types of user groups and share the common records among groups.
To create groups
- Click Setup > Users & Permissions > Groups.
- In the Groups page, click Create Group.
- In the New Group page, do the following:
- In the Group Details section, specify the Group Name and Description for the group.

- In the Group Source section, select the group members. You can select users, roles, roles & subordinates, and different groups as members of the new group.
- In the Group Details section, specify the Group Name and Description for the group.
- Click Save.
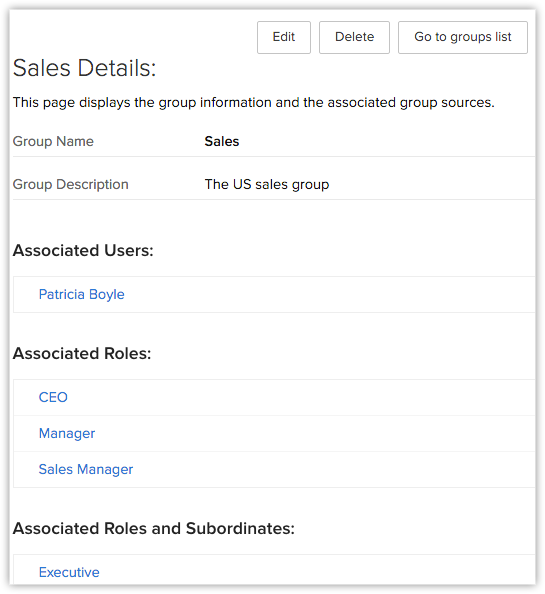
Assign Users to Group
After creating a new group, you can associate members with the group. As mentioned above, group members can be users, roles, roles & subordinates or other groups. After assigning group members you can share the Client management system data among users by applying data sharing rules.
To associate users to a group
- Click Setup > Users & Permissions > Groups.
- In the Groups page, select the group to which you want to assign users.
- In the Group Details page, click Edit.
- Under Group Sources, select the users.
You can select users, roles, roles & subordinates, and different groups as members of the new group. - Click Save.
Edit Groups
After creating groups, you can update the group name and group members as your requirements grow.
To edit groups
- Click Setup > Users & Permissions > Groups.
- In the Groups List page, you can see the list of Groups you have added.
- In the Public Groups List page, click on Edit.
- In the Edit Group page, do the following:
- In the Group Details section, specify the group name and comments for the group in Group Name and Description fields respectively.
- In the Group Source section, select the group members.
You can change the users, roles, roles & subordinates, and different groups as members of the new group.
- Click Save.
Delete Groups
Periodically you may consider cleaning up the unwanted groups using the delete function. While deleting, all the data sharing rules will be calculated automatically, updating the changes, so you won't need to recalculate them.
To delete Groups
- Click Setup > Users & Permissions > Groups.
- In the Groups page, the list of group names will be available.
- Click the Del link to remove any Group from this list.