Signature Chat
Make a way for your customers to chat with you from the Emails you send. Pass on your communication channels of your Mailing address, Contact number to your Email recipient. Get ready to feel the difference with fine tuned Visitor tracking and live chat Signature Chat.
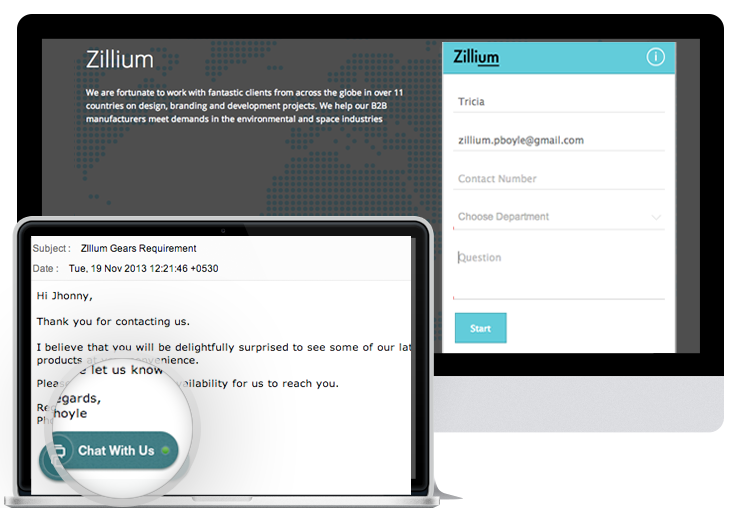
Configuring Signature chat
To get the signature chat code for your embed, you have to first enable it in your embed settings.
- Click “Settings”.
- In the Web Embed section click on an Embed’s name to enter in that specific embeds details page.
- Hover over the signature section, and click “Edit”.
- Tick the check box and “save”
- This will enable the Signature chat for your Embed.
Finding your Signature Chat Code
- Click "Settings".
- In the Web Embed section, click on the name of the Embed you want to take the signature chat code from.
- Scroll down to the bottom section you will find the signature code which you required to paste it in your Email signature directories.
Signature Chat Code
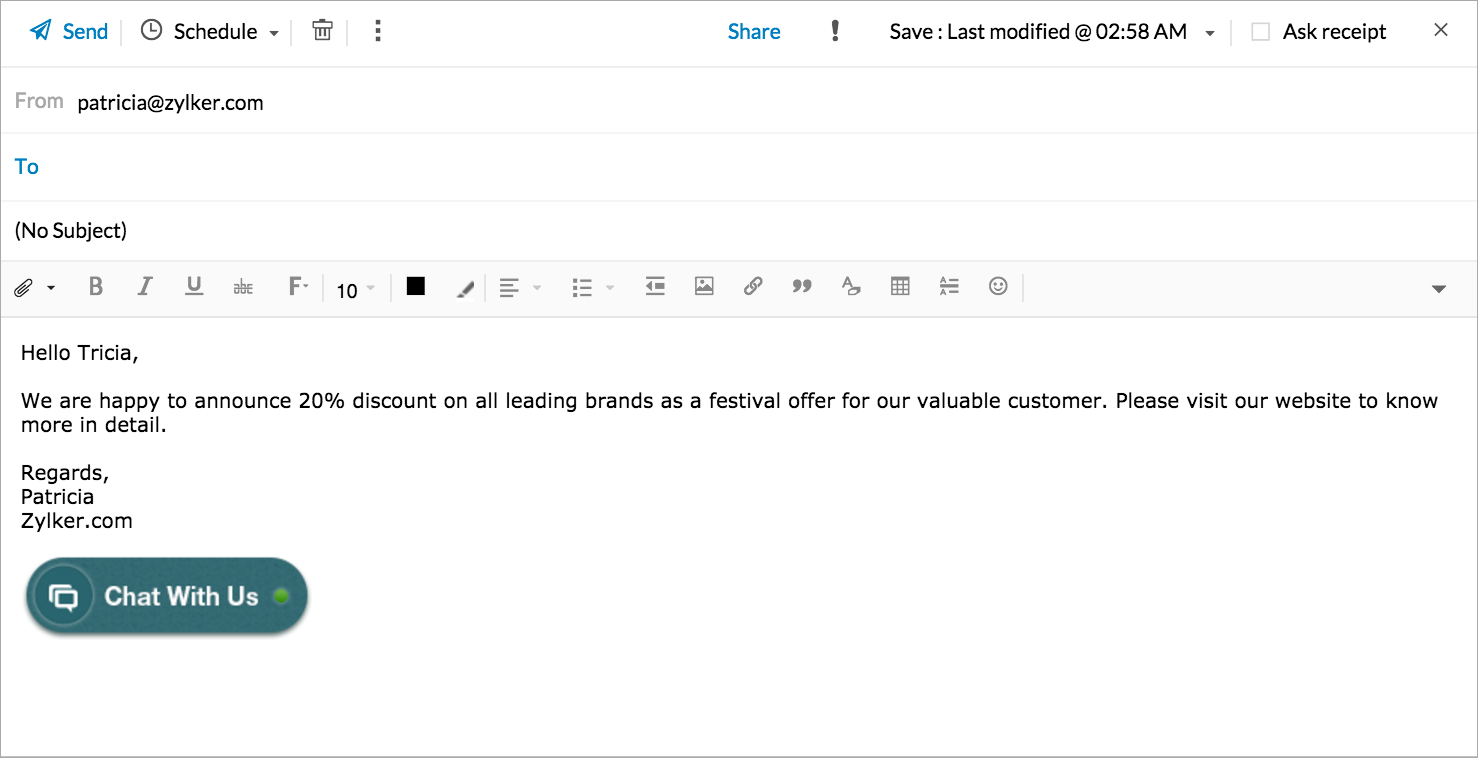
We give you unique snippet code for each specific Signature chat embed. You simply have to copy and paste that code into your right Signature directories, to get the Signature Chat in your mails which you send.
You will see three Different Links. Signature Chat code, Image URL and Link URL
- Signature Chat Code – This is used when your email client accepts Html Code to get the signature from Visitor tracking and live chat .If your email does not support the Html Code please use the below.
- Image URL – To pull out the image from Visitor tracking and live chat to your Email Signature.
- Link URL – Add this Link URL to the Signature Image to open up a signature chat page for your email recipient on clicking over it.
Predefined Signature Themes
You can further customize the look and feel of your Visitor tracking and live chat Signature by choosing your preferred signature from the drop down. Visitor tracking and live chat gives you seven different types images for your email signature. Choose your desired one to have the code.
Signature Themes up
Abyss

Blast

Ebony

Eclipse

Ecstasy

Luna

Wilderness

Adding your own customized signature themes
Email Recipient Signature Chat Page
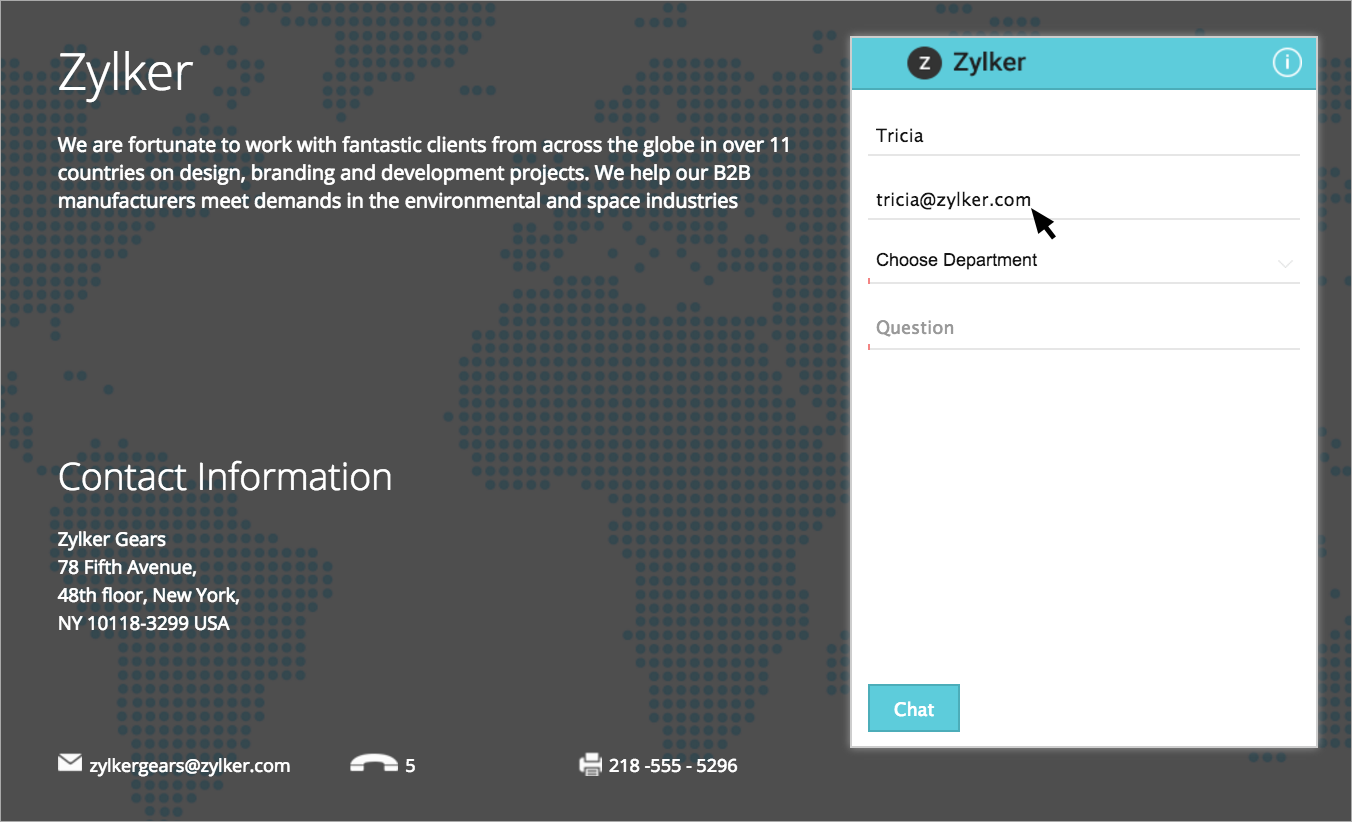
Now your Email Recipient can initiate a chat from your Emails on a click. Clicking the signature from your email, will open up a Signature Chat Web Page with Company Name, Contact address, Phone number, Email address, Information about your company and a chat window for your Email recipient to chat back.
Changing Company Information in your Signature Chat Page
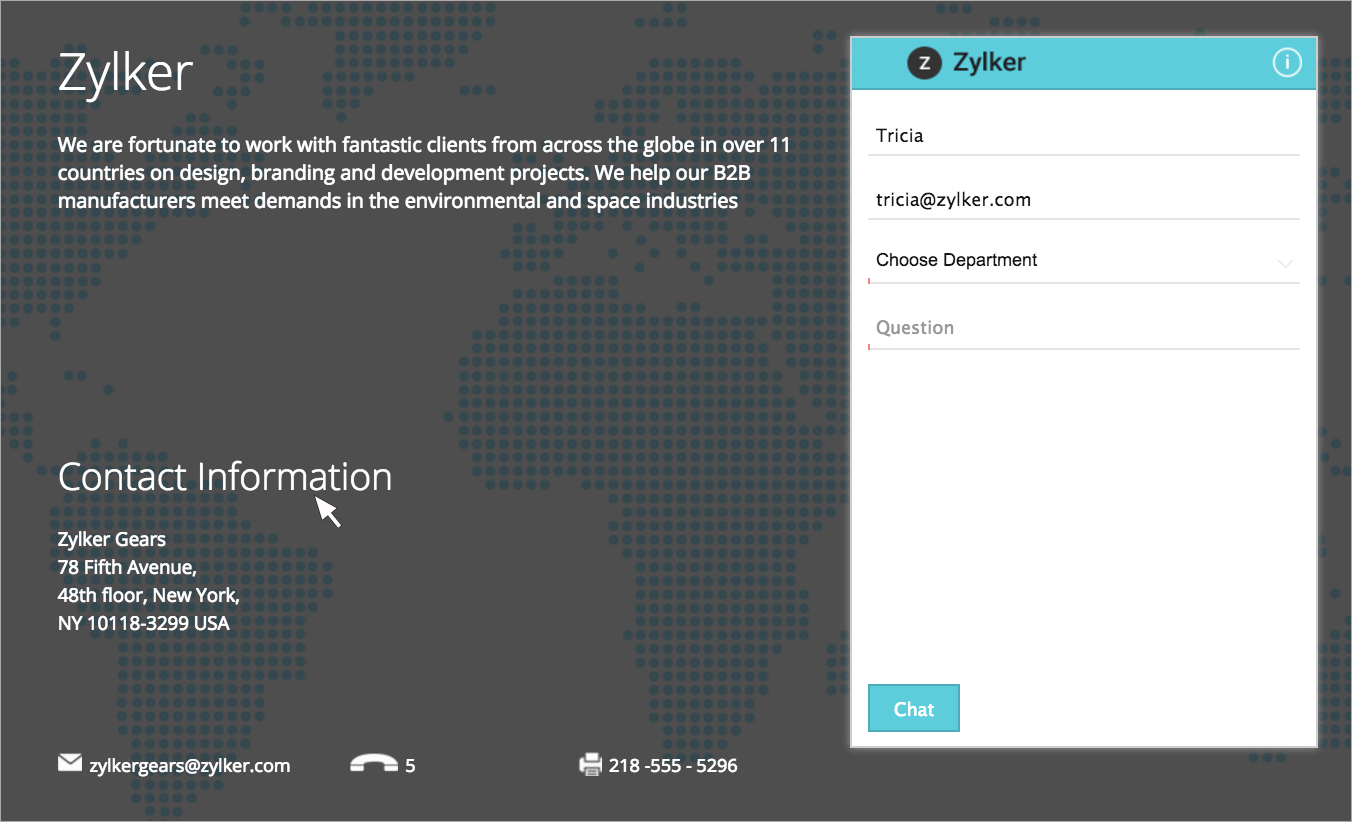
Company name, Contact address, Phone Number, Email address and information about your company can be customized in the company settings of Visitor tracking and live chat operator Console.
- Click “Settings”.
- In the Company section, click “Edit”.
- In the page that appears you can edit details about your company, including Company Name and Website, along with contact information—Address, E-mail, phone number and fax number.
- In this same page you can also add a description “About the Company”.
- Click “Save”.
Changing Company Logo in Signature Chat Page
Before using Signature chat with your customers, ensure your Signature chat page reflects your company logo accurately. Within your Visitor tracking and live chat it is easy to replace the default logo with your company's logo, which will appear in the header of the Signature chat page and to the top of the chat window.
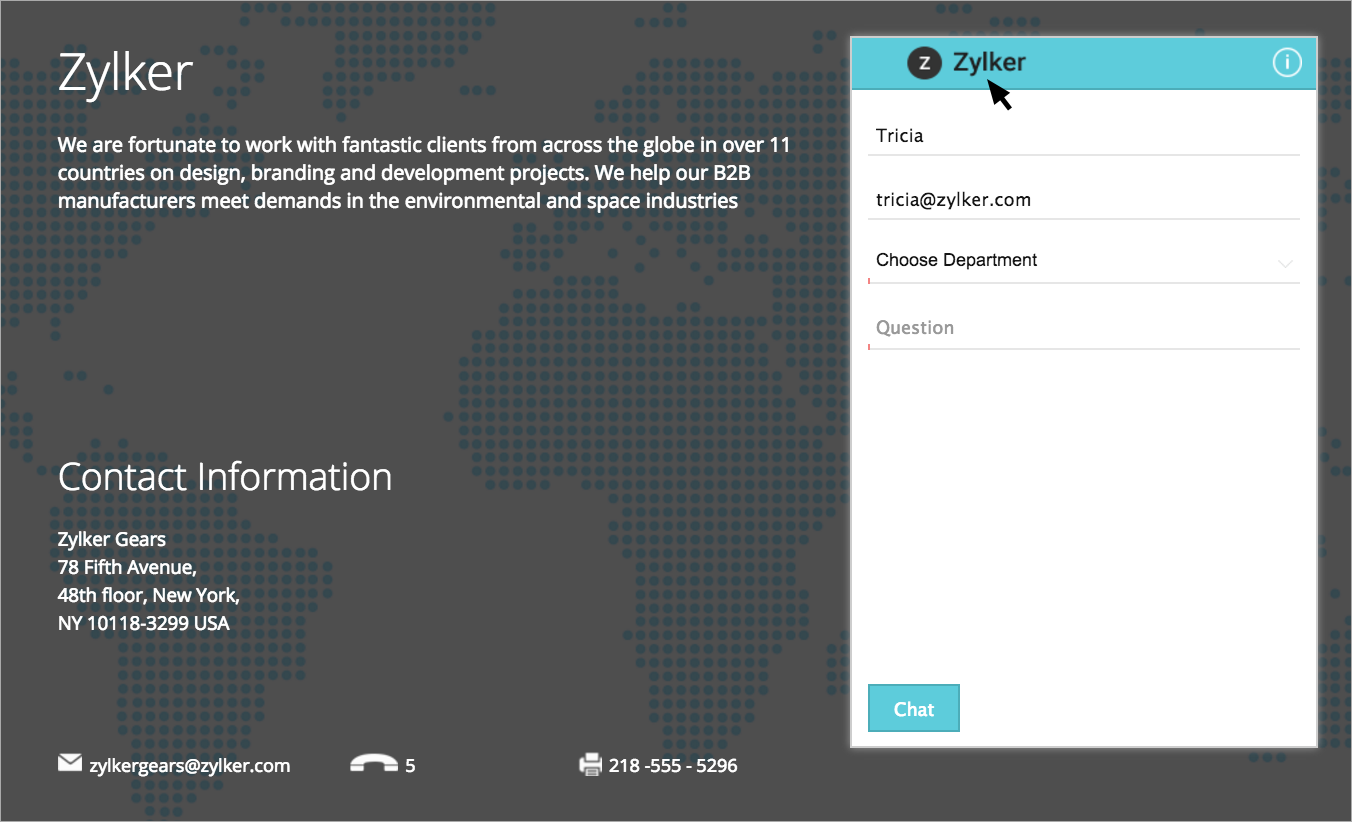
- Click “Settings”.
- In the Company section, hover over the current logo image and click “Change Logo”.
- This will pop-up a Choose File window, where you can navigate to your locally stored logo and once chosen, click “Open”.
- Your chosen file will then be uploaded and inputted automatically.
- Click “Save”.
Note: For best results, set the dimensions of the logo to 150 (width) by 30 (height) pixels. The file format should either be. jpg,. png or. gif.
Hiding Company Logo in Signature Chat Page
If you don't want your company logo to be displayed in the Chat Window. You can hide the Company logo through web embed customization.
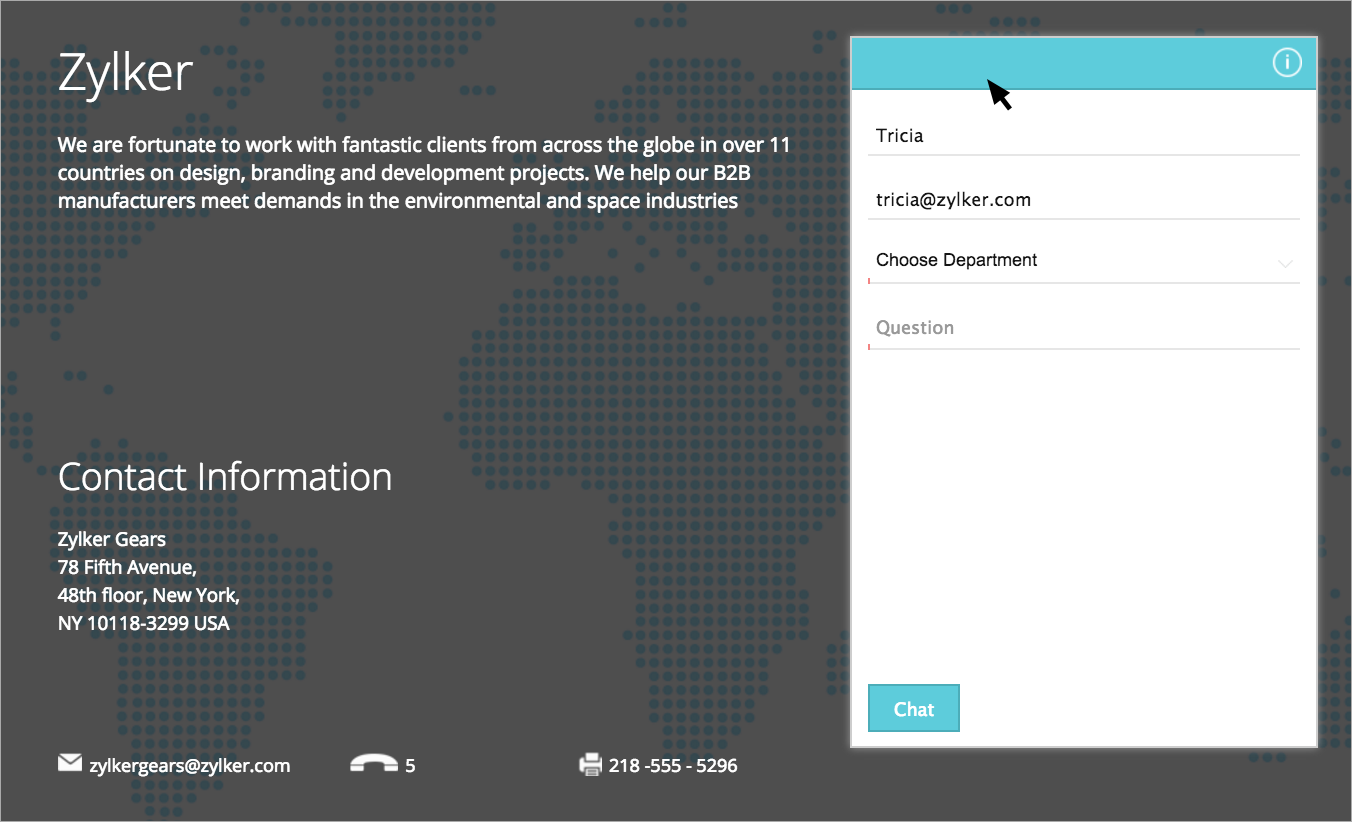
- Click “Settings”.
- In the Web Embed section, click the name of the embed which you want to customize the signature chat window.
- Scroll down to the Window Chat Appearance section and click “Change the Appearance”.
- Go to “Header section” Include (or not) your “company logo”.
- Make the changes.
• Click “Save”.
Configuring required Visitor Information in Signature Chat page
You can configure the input fields such as Visitor Information like Name, Email and contact number in the Chat Window of the Signature Chat page or you can even make it mandatory for those fields.
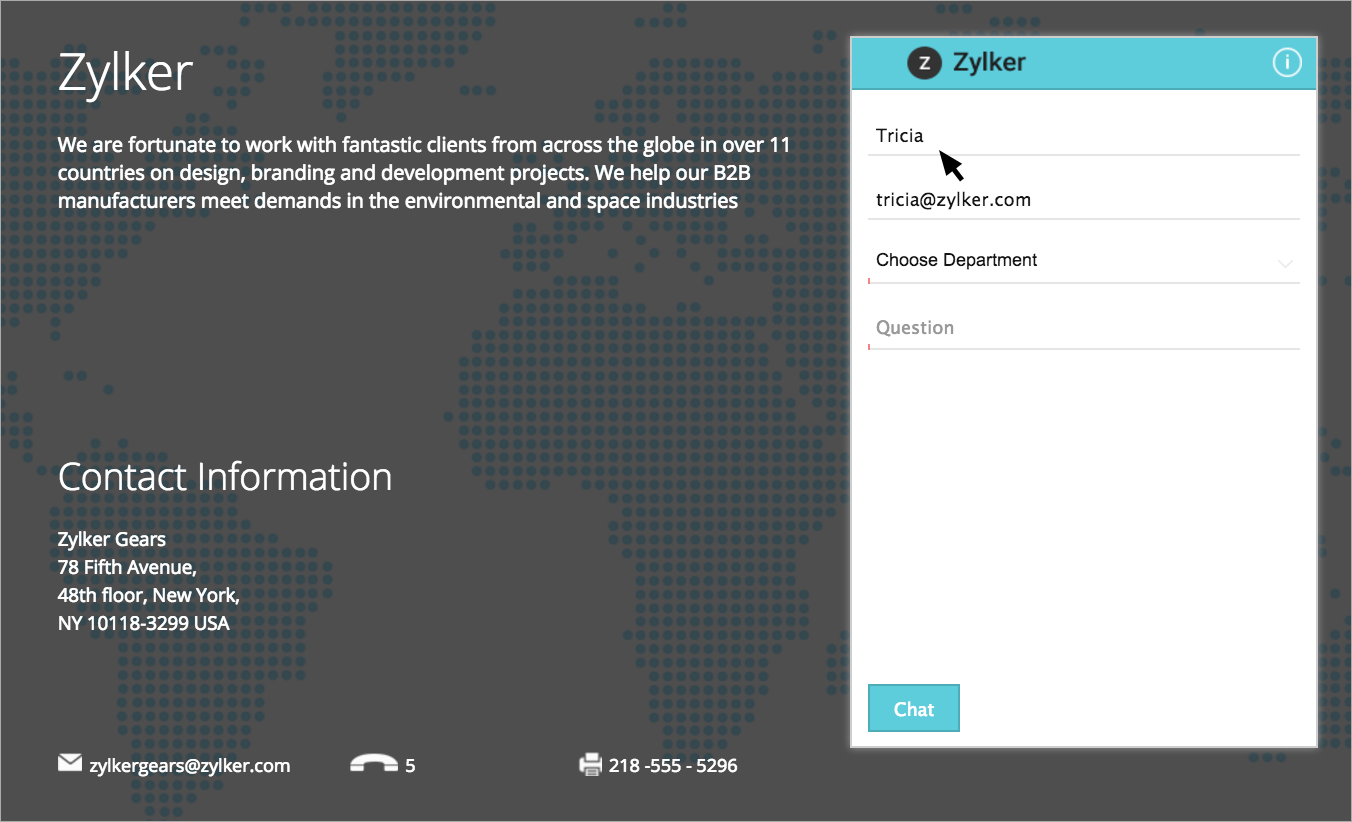
- Click “Settings”
- In the Web Embed section, click the name of the embed which you want to customize the signature chat window.
- Scroll down to the "Chat Window Appearance" section and click “Change the Appearance”.
- Go to Visitor Information, to Configure the input fields name, e-mail and contact number which need to be displayed before initiating a chat, or if you want to make those fields mandatory
- Click “Save”.
Configuring and Selecting Department in Signature Chat page
For a chat window placed on your signature chat page, you can allow your email recipient an option to choose the department they want to chat with. So these chats will be routed only to the specific agents of those department.
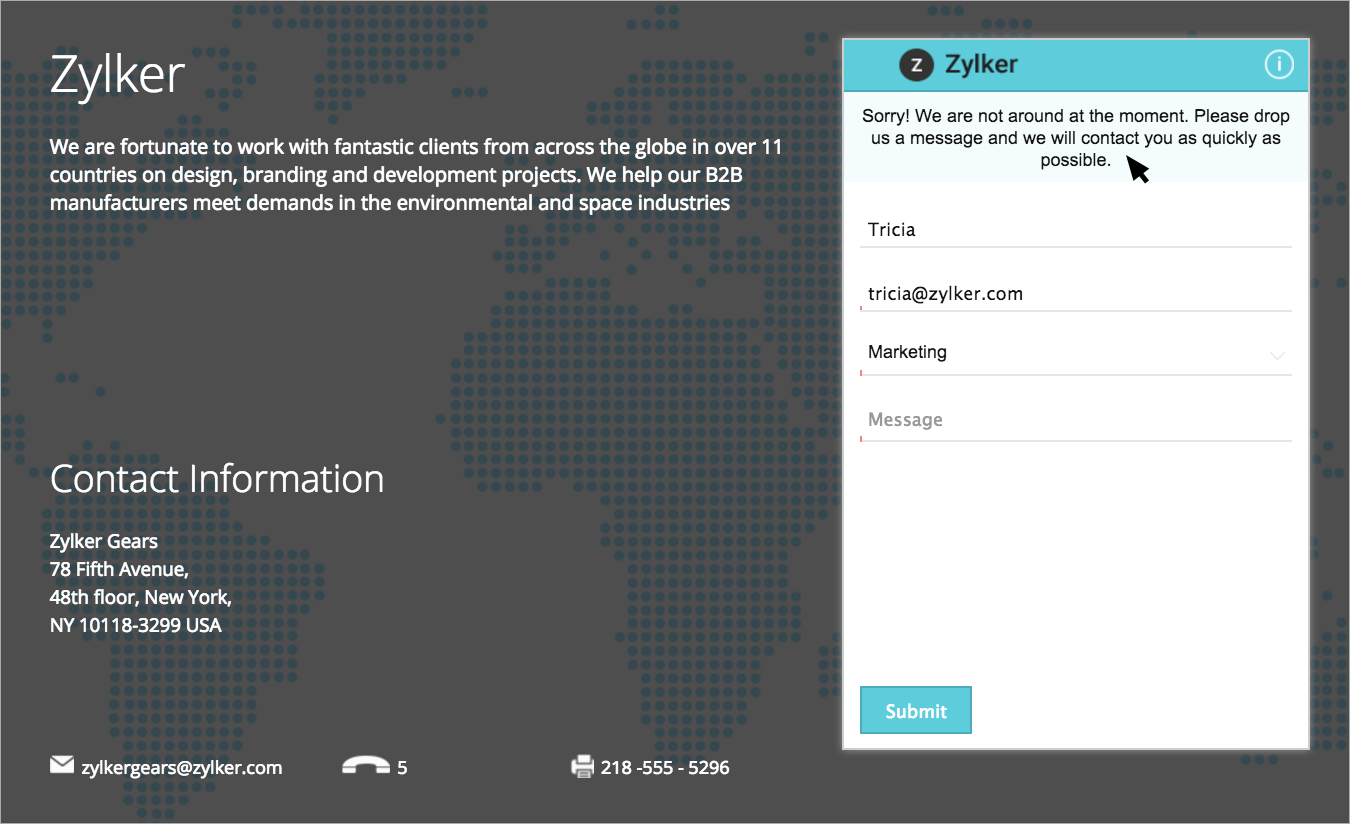
- Click “Settings”.
- In the Web Embed section, click on the name of the embed which you want to customize the signature chat window.
- In the Department section, hover over the current details and then click "Edit".
- Choose from the drop down list a specific department to route all chats from the embed to, or choose “allow user to select department”.
- Click "Save".
Changing Chat waiting time in your Signature Chat page
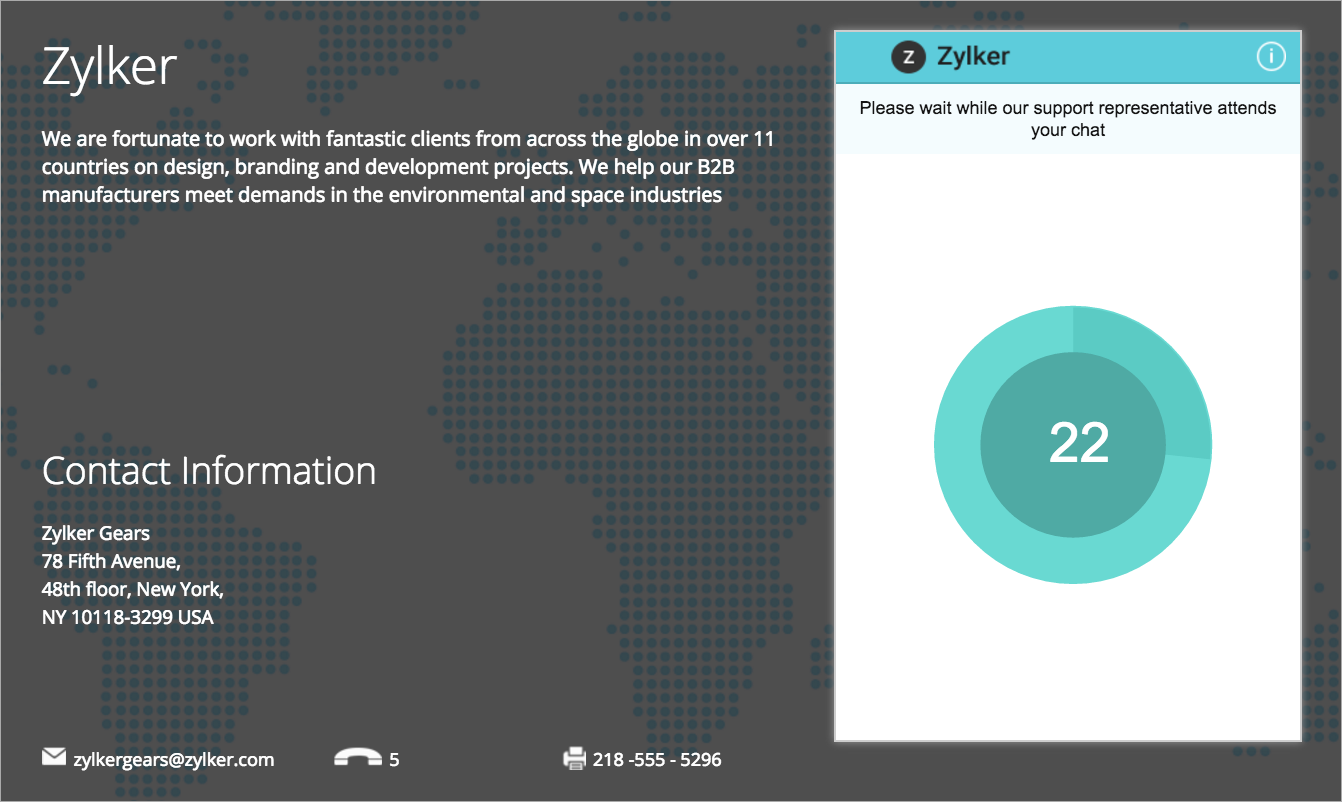
When an Email recipient clicks your Signature chat to connect with you, it is possible to choose your desired waiting time, your choices are 30, 45, 60, 90, and 120 seconds. If you could not answer the chat request within the pre-defined time, those chat will be tracked as Missed, you can reply to those chats via Email from your Operator console. Visitor tracking and live chat takes the default time as 60 seconds if the waiting time is not selected.
- Click “Settings”.
- In the Web Embed section, click on the name of the embed which you want to customize the signature chat window.
- Hover over the “Waiting Time section”, the default will be 60 seconds, and click “Edit”.
- Choose you’re desired waiting time, your choices are 30, 45, 60, 90, and 120 seconds.
- Click “Save” to confirm the changes you have made.
Configuring Signature Chat Specific messages
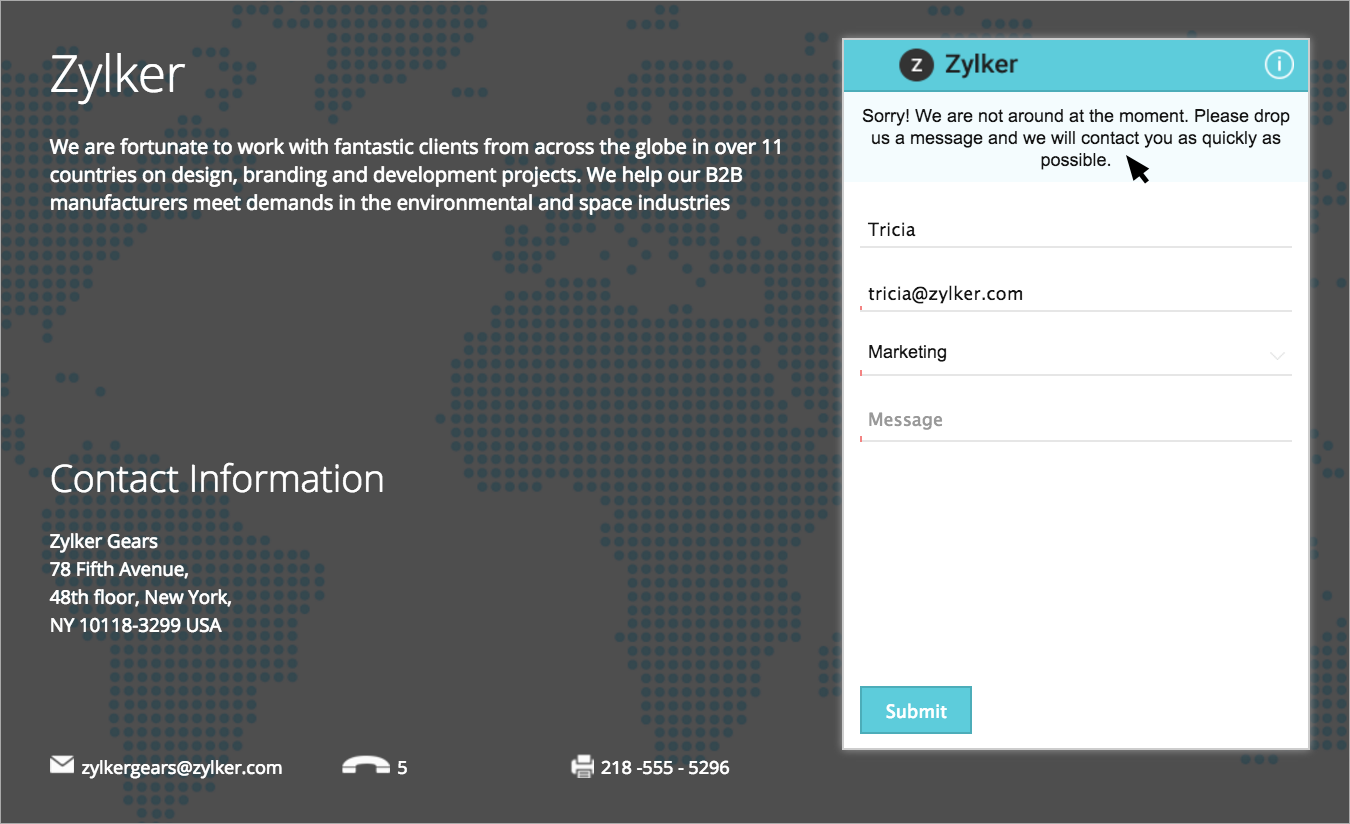
There are many times when certain situations arise, that you have to display a message to your Email Recipient who is initiating the chat. Leave your tone and style on these messages, and further enhance the totality of your customer service experience through live chat.
- Click “Settings”.
- • In the Web Embed section, click on the name of the specific embed you would like to edit.
- In the “Configure Messages section”, Click "Configure Messages" to customize the embed’s display messages.
- Hover over each message section you want to edit, and click “Edit” to bring up the input box.
- Enter your desired message, up to 100 characters.
- When you have finished customizing your display messages to your visitors, click “save” under that message’s input box.
Disabling Signature Chat
You can disable the configured Signature chat from your embed settings when it is no longer required or if you would like to freeze it for some time. On disabling your Signature will get hidden down even if the Emails are already sent to your email recipient.
- Click “Settings”.
- In the Web Embed section click on an Embed name to enter in that specific embeds details page.
- Hover over the signature section, and click “Edit”.
- Remove the Tick in the check box and click “save”.
- This will disable the Signature chat for your Embed.
Enabling Signature Chat
You can enable the configured Signature chat from your embed settings on need. On Enabling it again, will show your Signature to your email recipient again to initiate a Chat.
- Click “Settings”.
- In the Web Embed section click on an Embed name to enter in that specific embeds details page.
- Hover over the signature section, and click “Edit”.
- Tick the check box and click “save”
- This will enable the Signature chat for your Embed.
Initiating a chat from Signature chat window
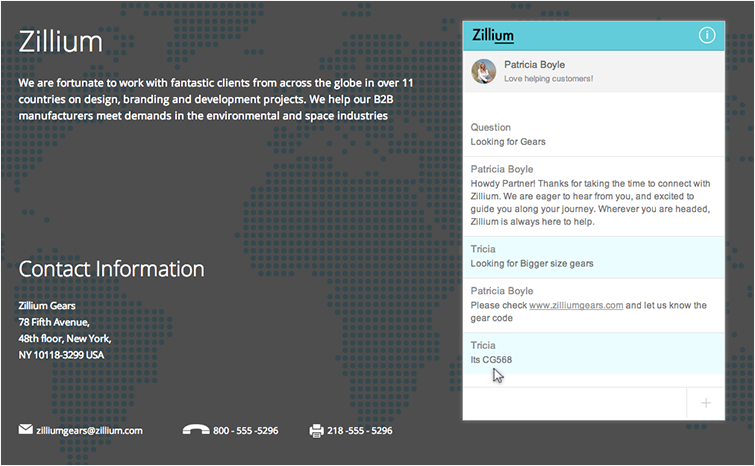
Once your Email recipient has entered all the required fields, with the required question they can initiate a chat to you directly. However you should be logged in to Visitor tracking and live chat to get notification and reply back.
Adding Signature Chat to Email sent from your Visitor tracking and live chat
You can add signature chat for the mails sent from Visitor tracking and live chat with ease. You Just have to enable and select the required signature in your portal settings and add an E- mail signature to all the mails sent to your visitors to chat back in one click, you can choose your desired email signature. (Abyss, Blast, Ebony, Eclipse, Ecstasy, Luna, Wilderness. Selecting none will not add any e- mail signature
- Click "Settings".
- In the Portal Settings section, scroll down to the e-mail configuration section. Click on the "signature chat"drop down and select the desired signature theme.
Adding Signature Chat to Mail
You can add signature chat for the mails sent from Mail. You Just have to copy the link from the Visitor tracking and live chat and Paste it into the right directories.
- Go to "settings" in your mail in the top right corner.
- Select the "Signature" tab from the personalize.
- Click "Add Signature".
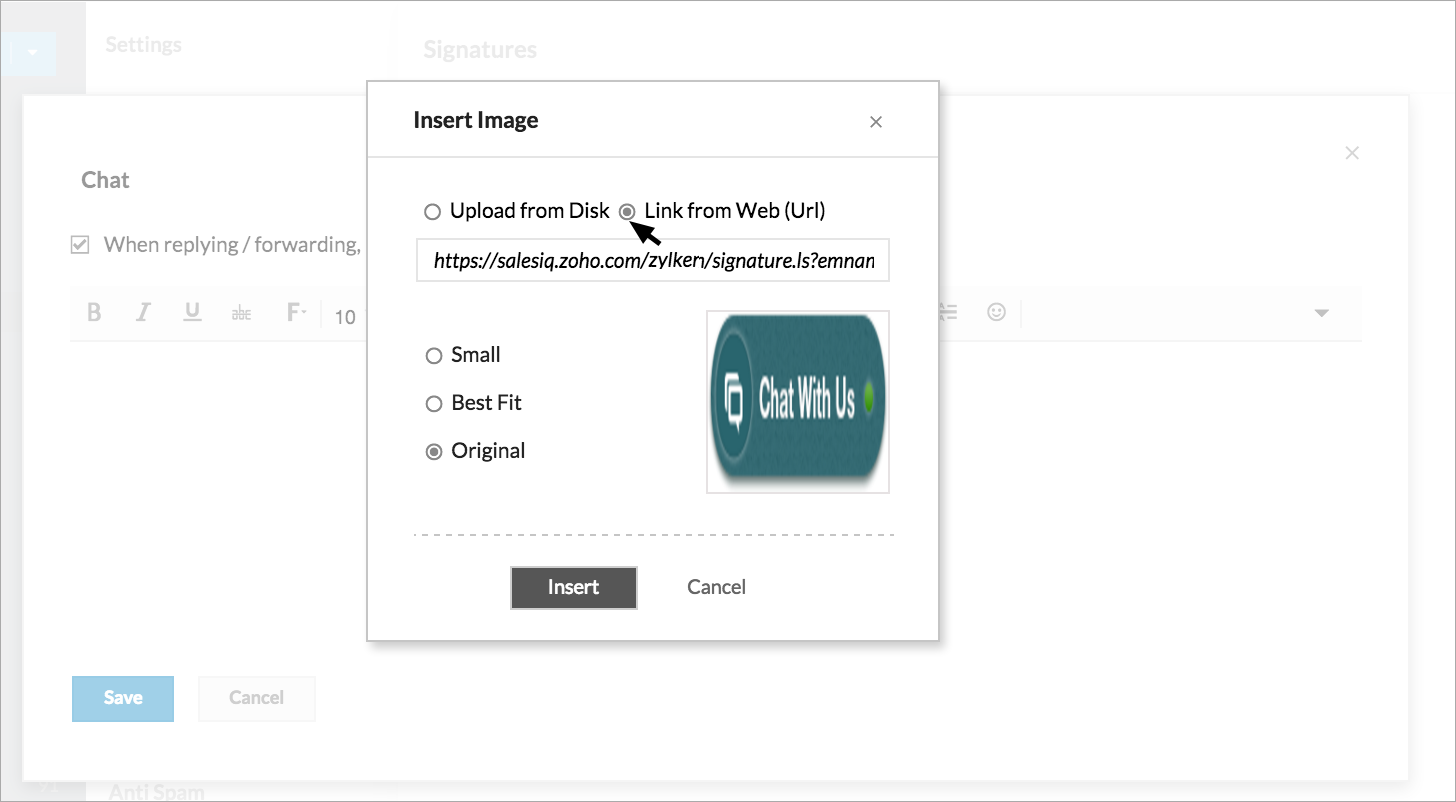
- Click on the "Insert Image icon", Select the option "From Web URL"
- Copy and paste "Image URL" from your Visitor tracking and live chat embed settings.
- Click "Insert".
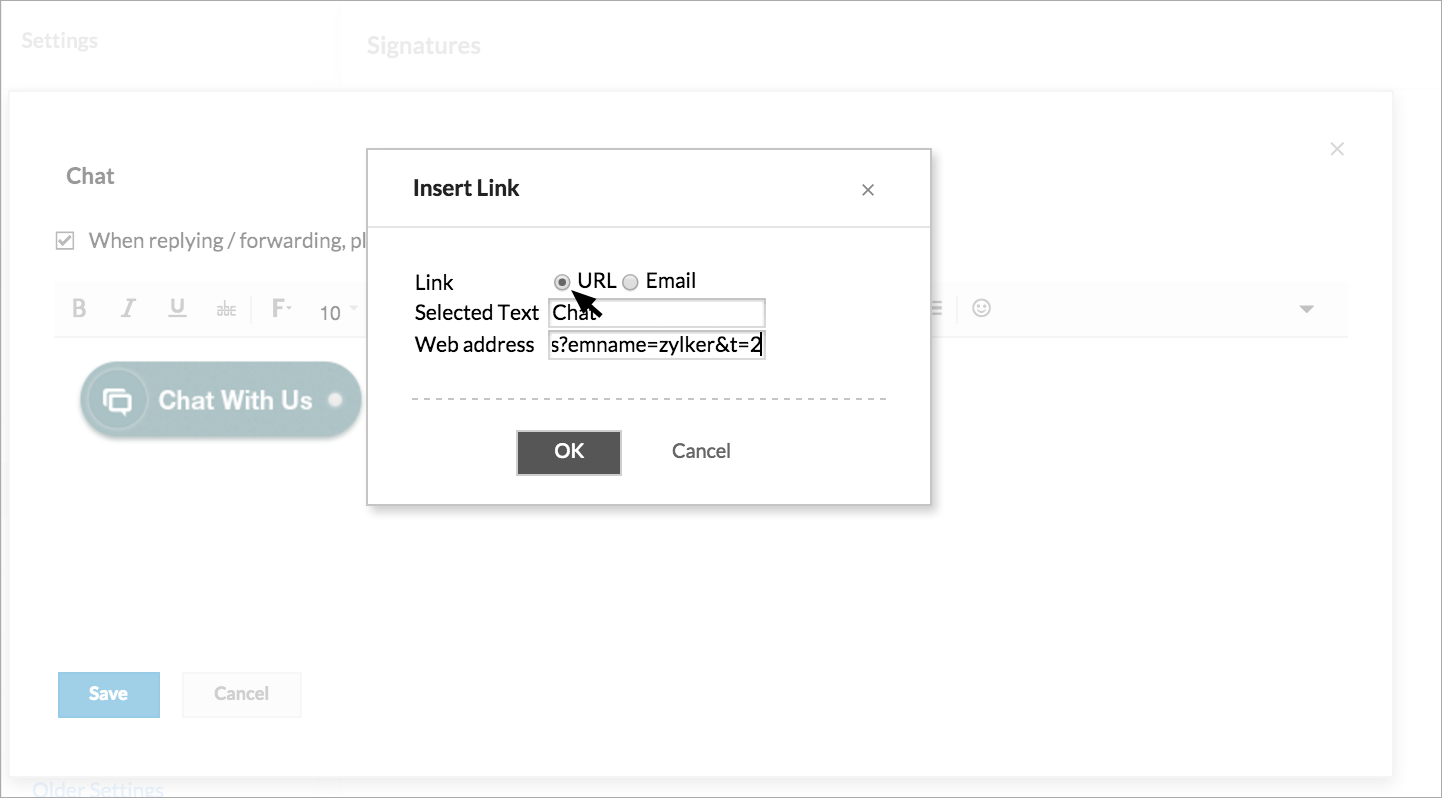
- Now "select" the Inserted Image/
- Click "Insert link".
- Choose the option "URL".
- Copy the "Link URL" from Visitor tracking and live chat and paste it and hit "Ok".
- Give a suitable Title and hit add.
- Now your Mail is equipped with Visitor tracking and live chat Signature Chat.
Adding Signature Chat to Support
Its easy to add Visitor tracking and live chat Signature chat in your reply emails sent from Support and get connected with your customers in real time. Your Customers just have click on the signature chat to move ahead on their support request.
- Go to your Support operator console.
- Click "Setup" in the top right.
- Move down to "My Information" in the "customize tab".
- Click on the "signature tab".
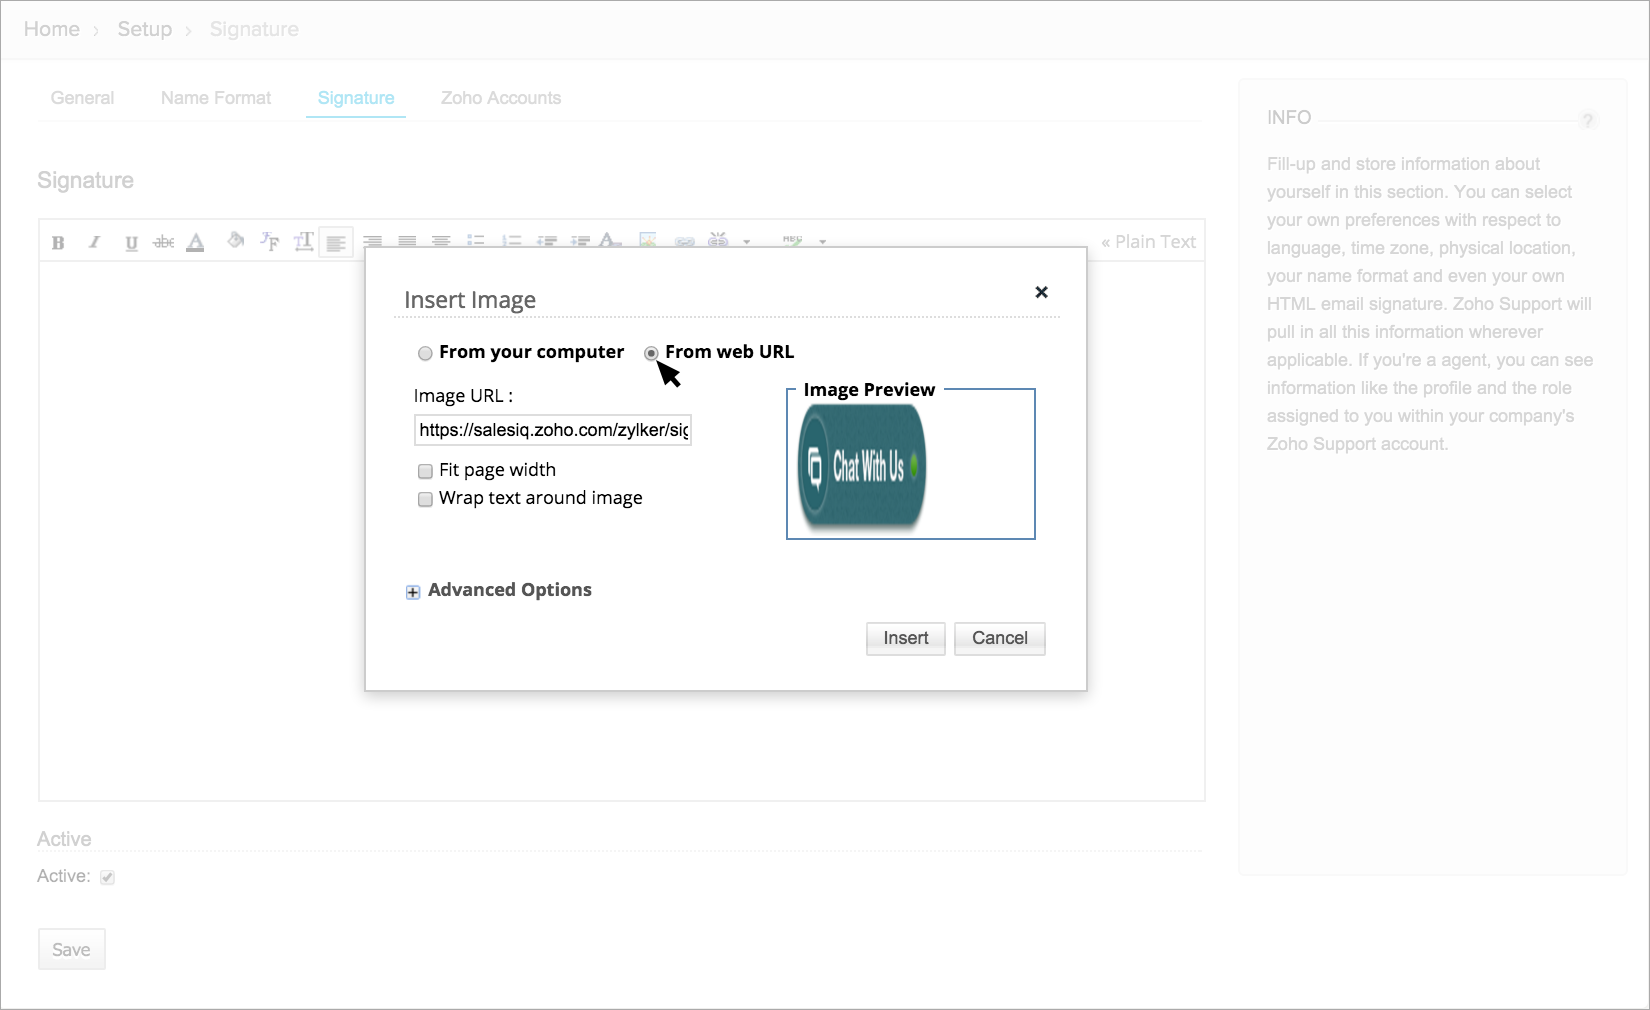
- Click on the "Insert Image icon", Select the option "From Web URL".
- Copy and paste the Image "URL" from your Visitor tracking and live chat embed settings.
- Click "Insert".
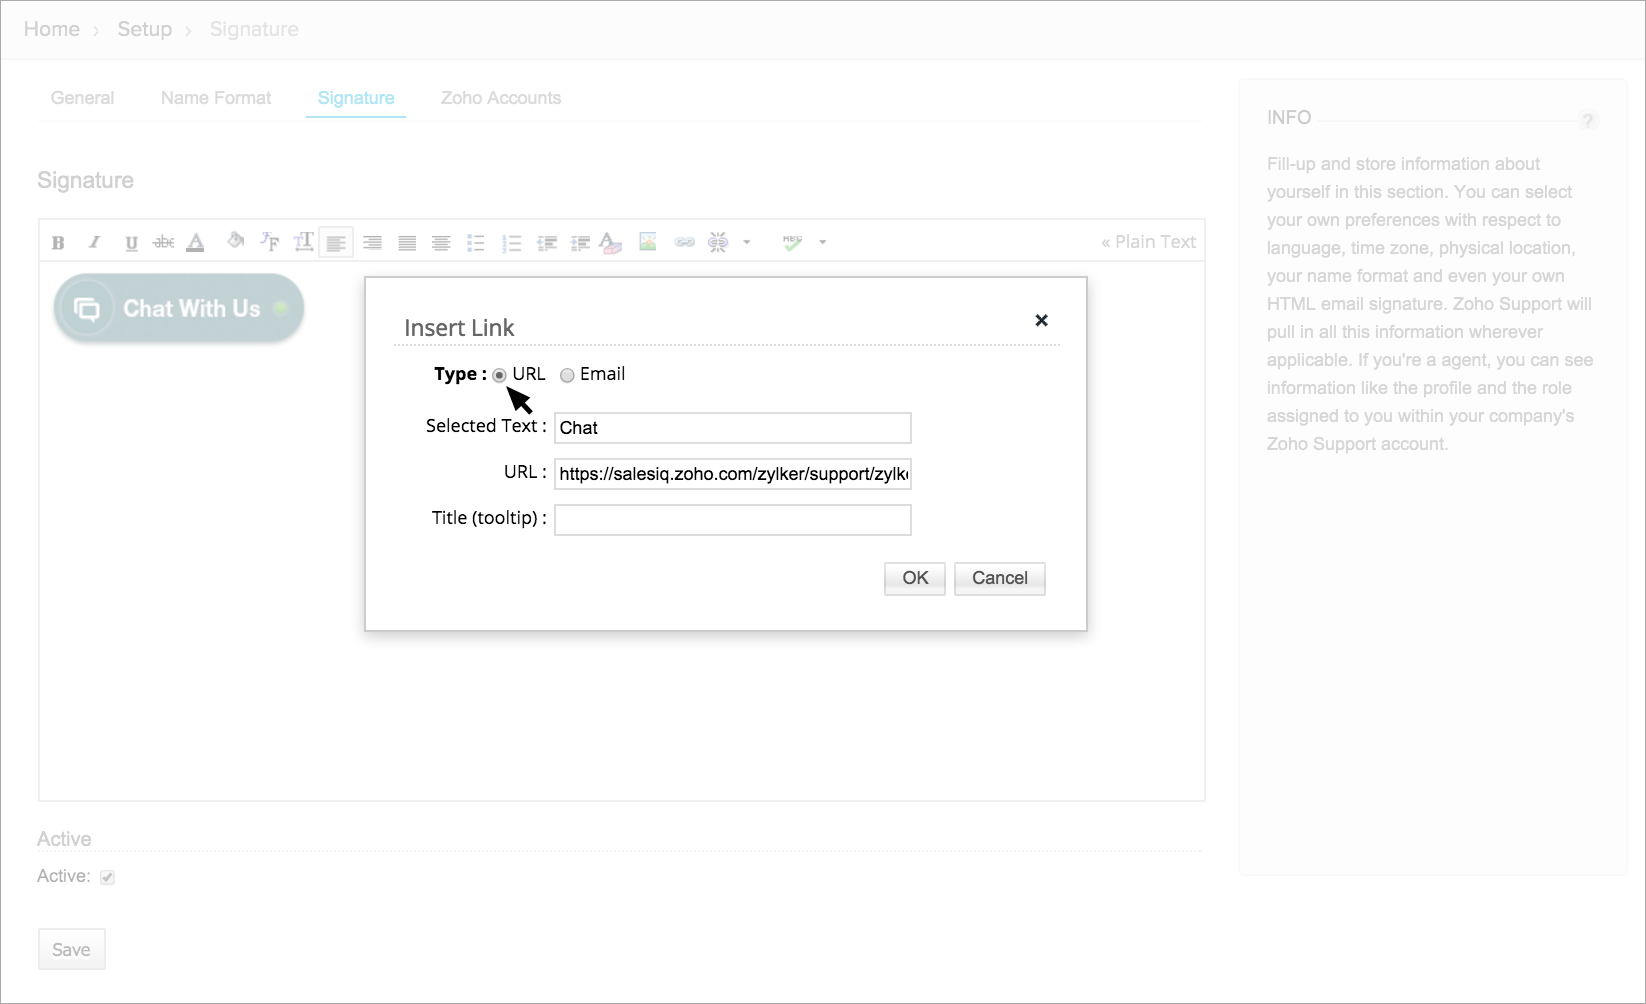
- Now select the Inserted Image.
- Click "Insert link icon".
- Choose the option "URL".
- Copy the "Link URL" from Visitor tracking and live chat, paste it and hit "Ok".
- Now your Support is equipped with Visitor tracking and live chat Signature Chat start engaging your support email recipient in real time.
Adding Signature Chat to Visitor tracking and live chat
Add your Visitor tracking and live chat Signature chat to the mails sent out to your customers from Client management system and get connected instantly to your customers from the mails you send. Start engaging your customers in real time through LiveChat.
- Go to your Client management system operator console.
- Click "Setup" in the top right.
- Followed by "Personal Settings" move to "Account Information tab".
- Click add on the "signature".
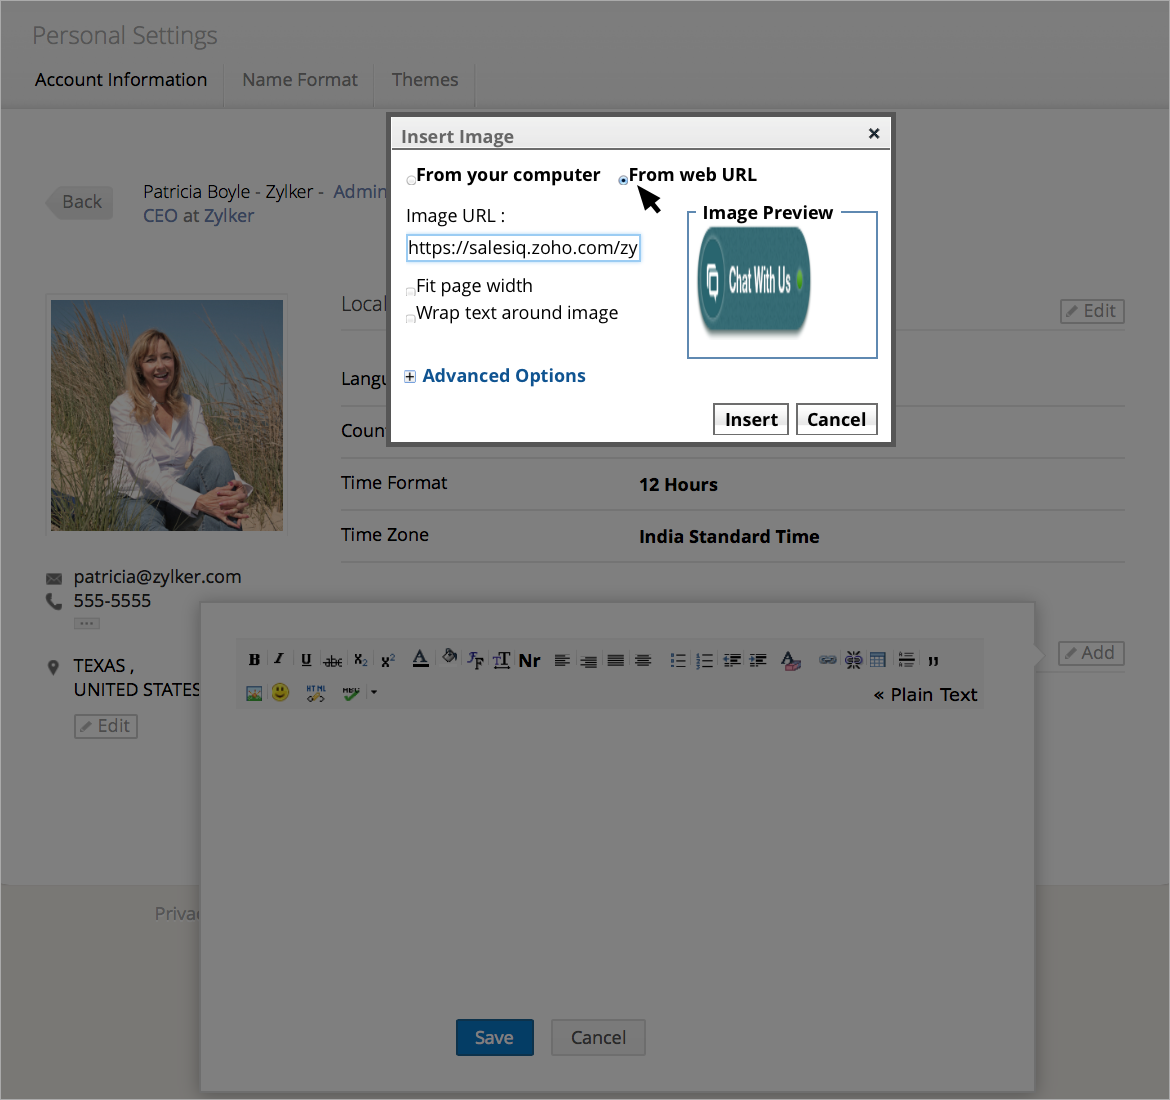
- Click on the "Insert Image icon", Select the option "From Web URL".
- Copy and paste the "Image URL" from your Visitor tracking and live chat embed settings.
- Click "Insert".
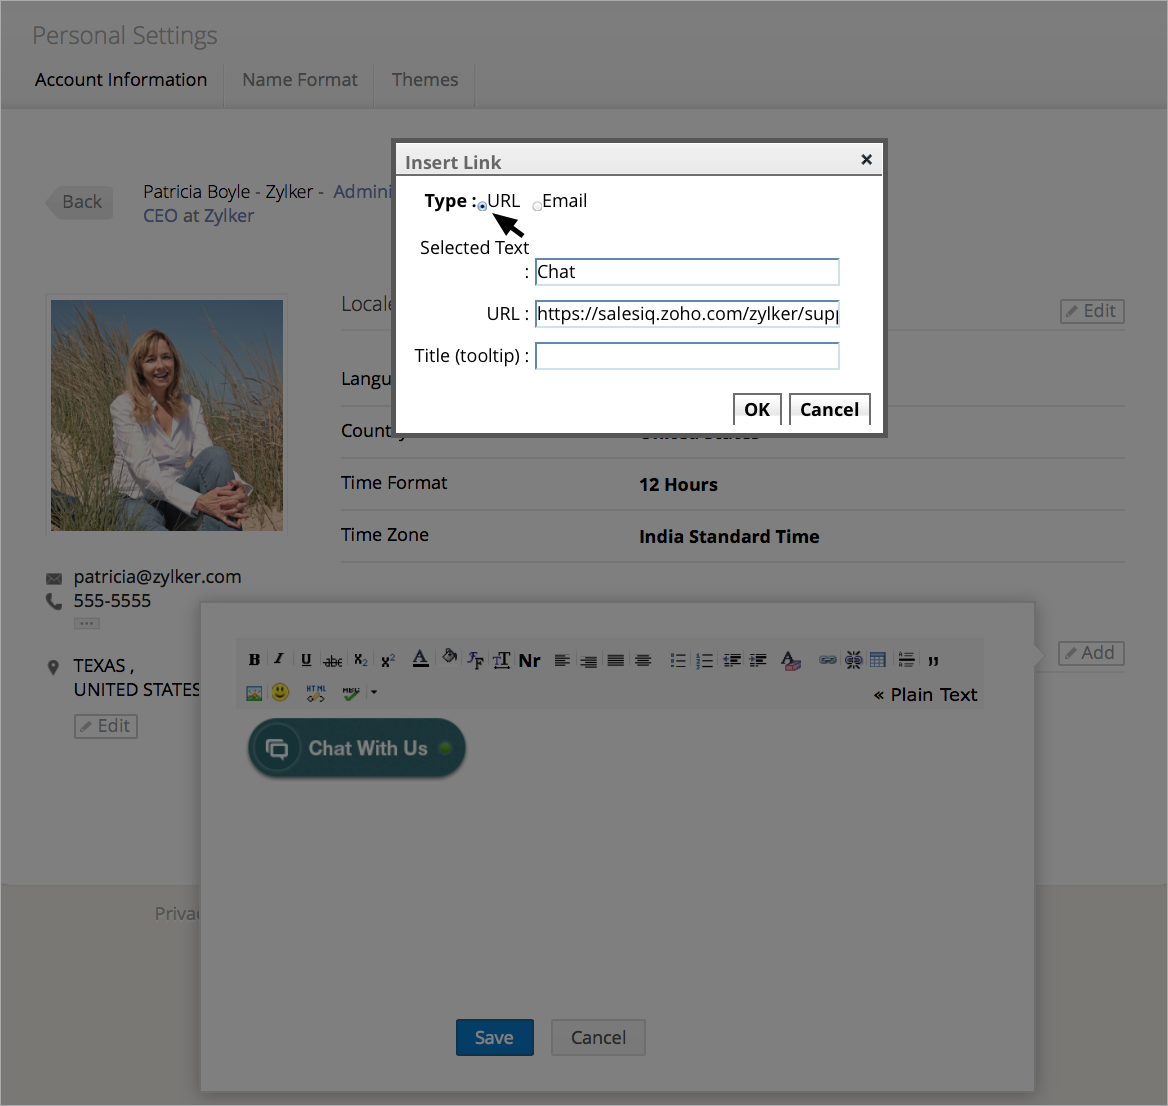
- Now select the "Inserted Image".
- Click "Insert" link icon
- Choose the option "URL" Copy the "Link URL" from Visitor tracking and live chat and paste it and hit "Ok" then "Save" and get ready to chat with your customers.
Setting up Signature Chat in your Gmail account
Visitor tracking and live chat Signature Chat has broader usage as to it can also be used in your Gmail. Keep sending mails and get replies through chat.
- After logging to your Gmail account, Towards the right you will find a "settings Icon" to click
- Click the "settings" from the drop down.
- Go to "General Tab", Scroll down to "Signature".
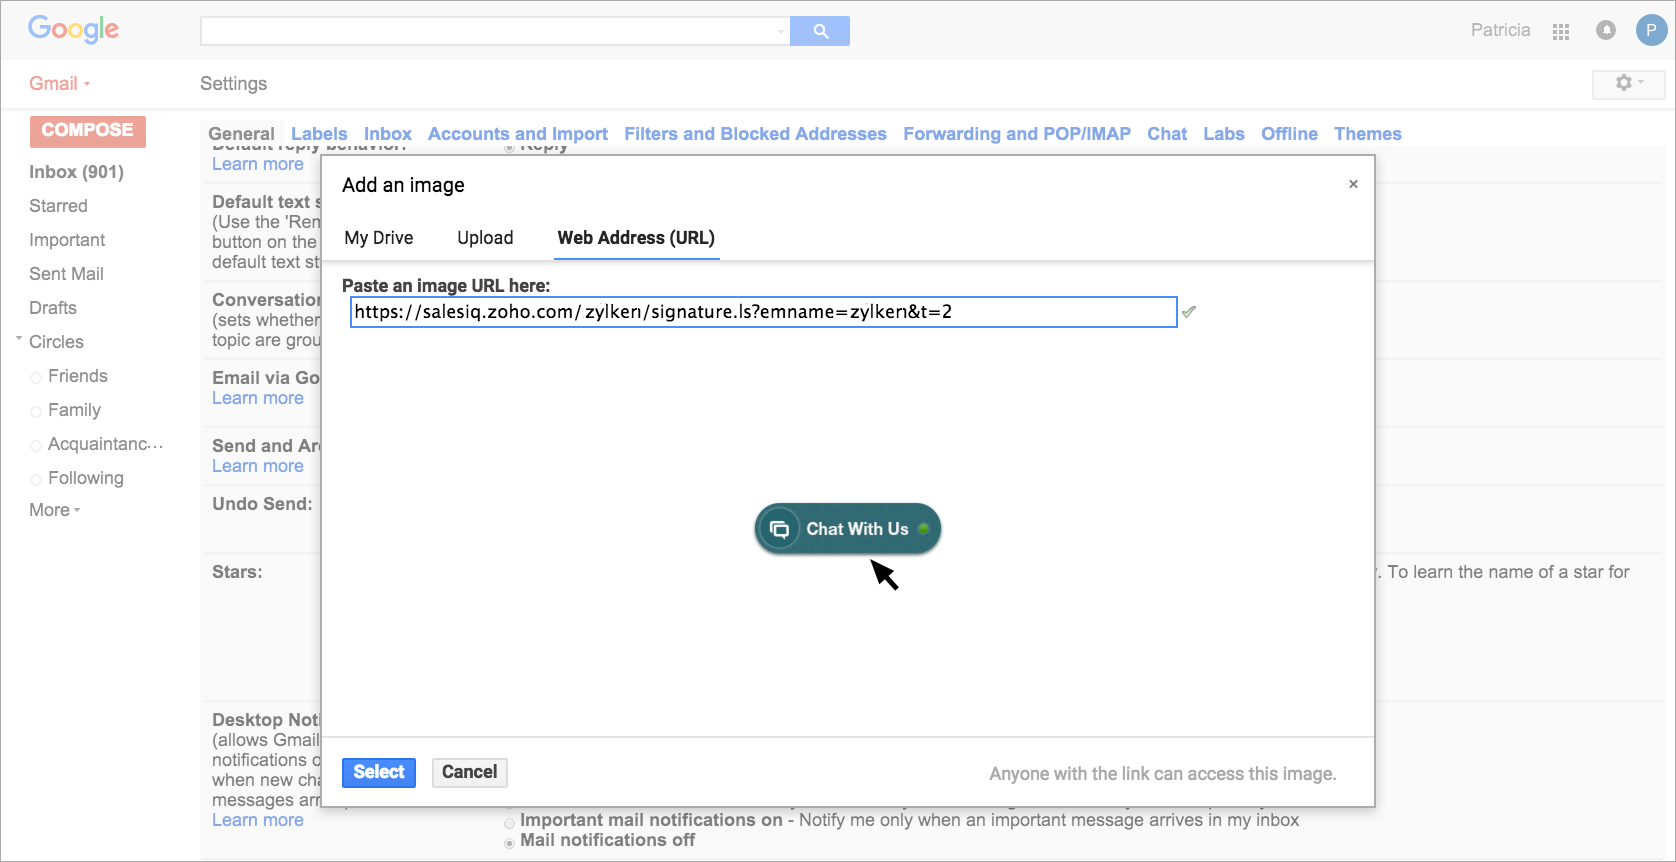
- Click the "Insert image icon"
5. Select the option "Web address URL". - Copy and paste "Image URL" from your Visitor tracking and live chat embed Settings.
- Click "ok"
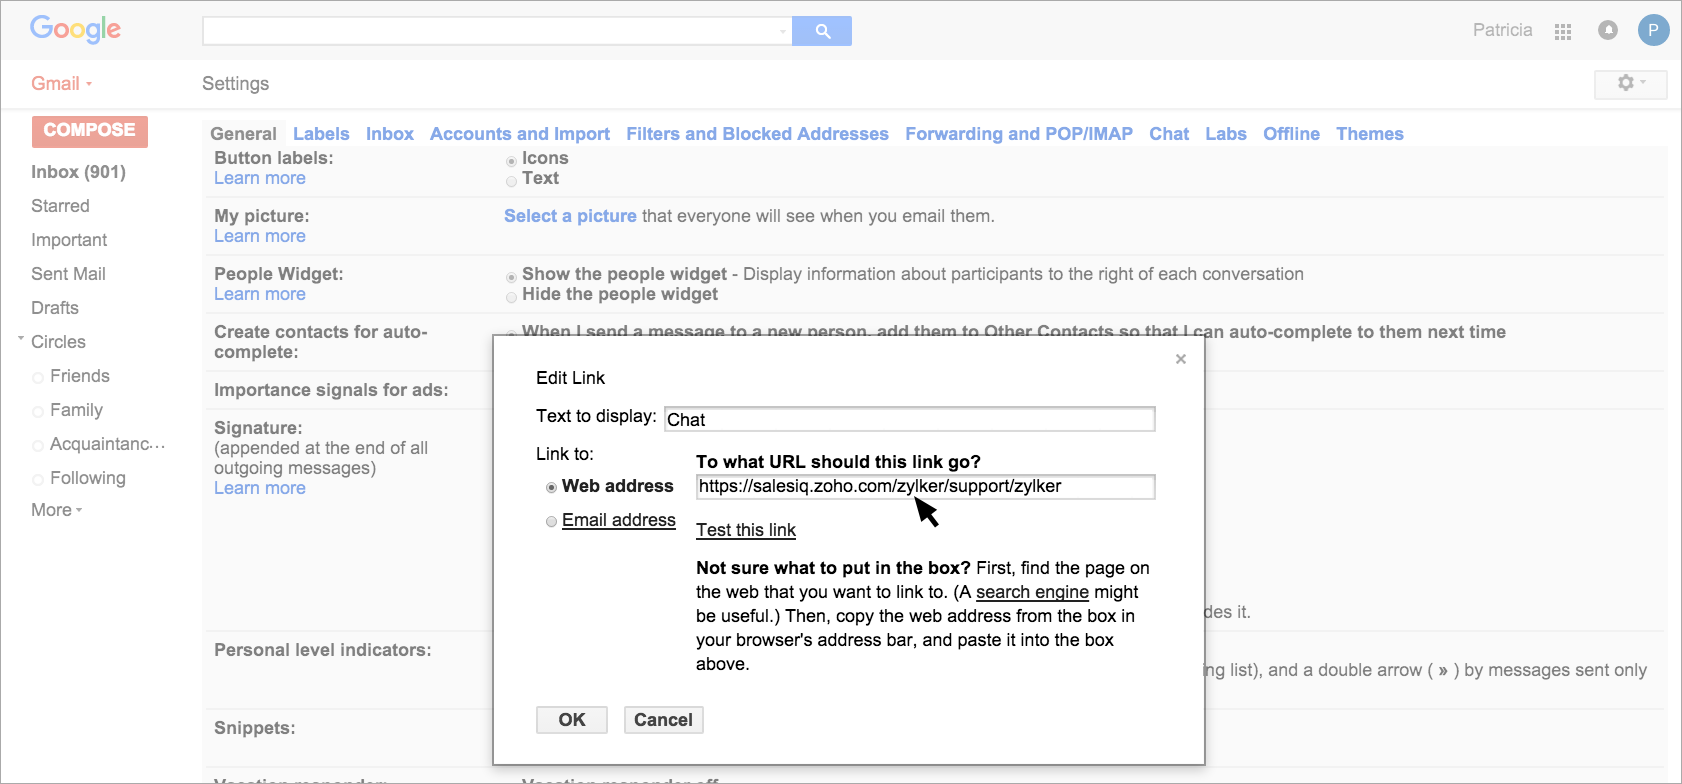
- Now select the "Inserted Image".
- Click "Insert link icon".
- Select the option "Web address".
- Copy and paste "Link URL" from your Visitor tracking and live chat embed Settings.
- Click "ok"
Setting Up Signature Chat in Outlook
Visitor tracking and live chat signature chat can also be used in your Outlook Emails and its quite easy to setup.
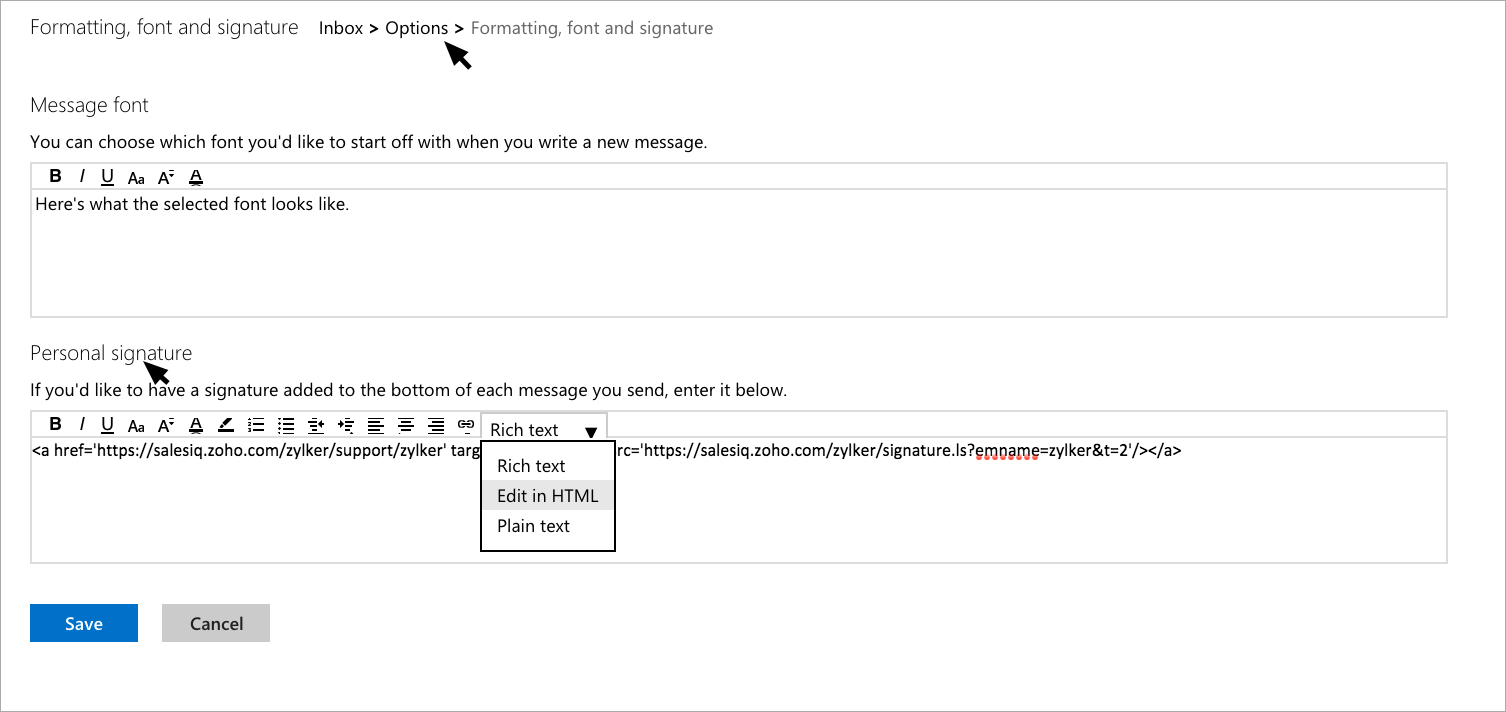
- Click on the “Settings Icon” in the top right
- Followed by “more mail settings” in the drop down
- Go to “writing email section” and select “Formatting, Font and Signature”
- Move down to “personal signature”, select “edit in HTML” from the drop down.
- Copy and paste the “Signature Chat Code” from Visitor tracking and live chat.
- Click “Save”, Your Outlook is now ready with Signature Chat. Keep sending emails and WOW your customers.
Related Articles
Use Signature
While sending emails to your customers, you can embed a signature automatically in the body of the message. Signatures can be customized as per your requirement. To use the signature feature Click Setup > Personal Settings > Account Information. In ...Chat Window
The standard chat window can be placed in your desired location on a page to give your customers easy access to your customer support through live chat. Finding your SalesIQ Chat window code Snippet Login to your SalesIQ Operator console. Click ...Online Group Chat (Chat Rooms)
Team Collaborations provides real-time collaboration through built-in chat rooms which allows everyone to quickly come together to discuss important topics and make decision faster. You can create chat topics, invite participants, discuss and above ...Website Feature: Live Chat
Advanced Live Chat Configurations
We built Visitor tracking and live chat from the ground-up to be live chat software that empowers your team to work together, engage with your customers and website visitors, drastically improve the speed, efficiency and quality of your customer ...