Time Tracking and Billing
Time sheets can record the start and end time of tasks, or just the duration. It may contain a detailed breakdown of tasks accomplished throughout the project or program. This information may be used for payroll, client billing, and increasingly for project costing, estimation, tracking and management.
Benefits of timesheet
- Work out the quickest possible time in which a team collaboration can be completed
- Log and track time spent on a task
- Record actual hours against your team collaborations which enables you to identify slipping deadlines
Record Working Hours in Timesheet
Time spent on tasks, which can be billed per working hour per day for the client are billable hours. On the other hand time spent on tasks that cannot be billed to the client are non-billable hours.
Log daily time entry
In team collaborations, select the required project, and click Timesheet. In List view click the Plus icon at the top right corner, to log time on a daily basis or for a week. You can log time from the List view, Grid view and Calendar.
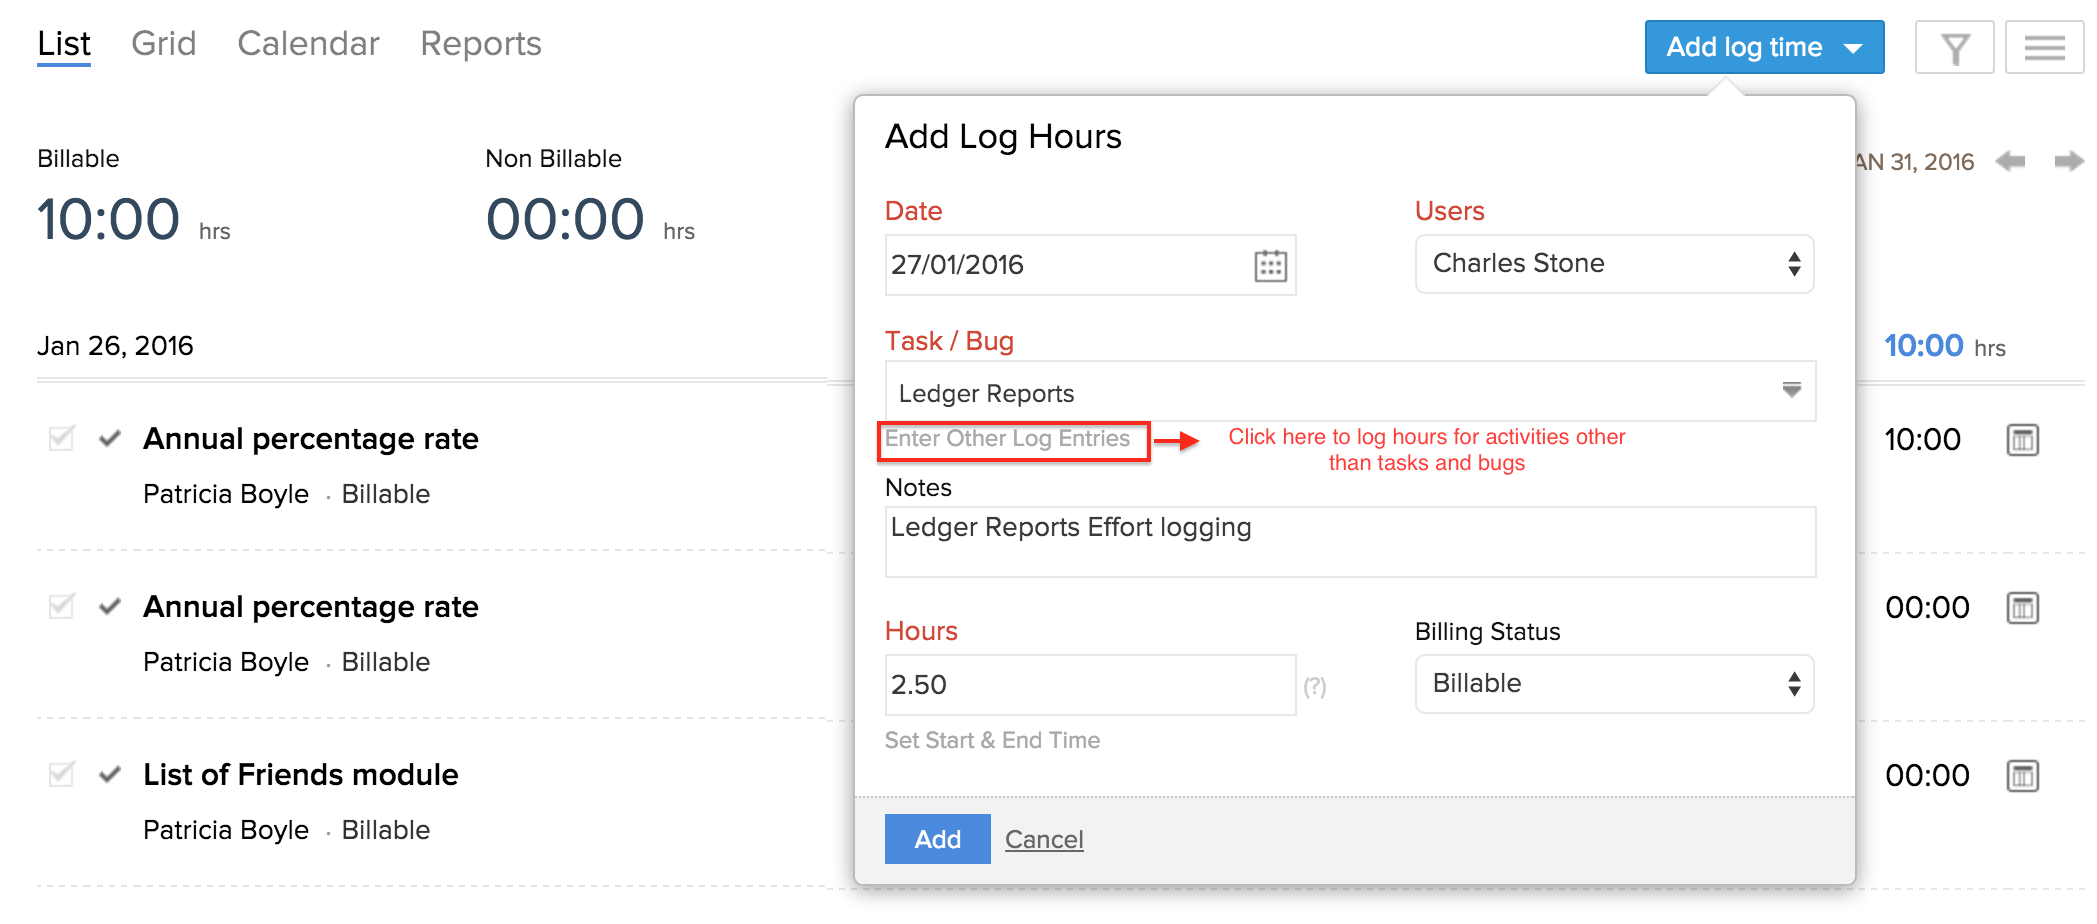
Click Log Time and specify the log details. You can enter a new task or select an existing task or bug to log time, select the billing status and then click Add.
This logs your working hours in the team collaboration timesheet.
Weekly log time
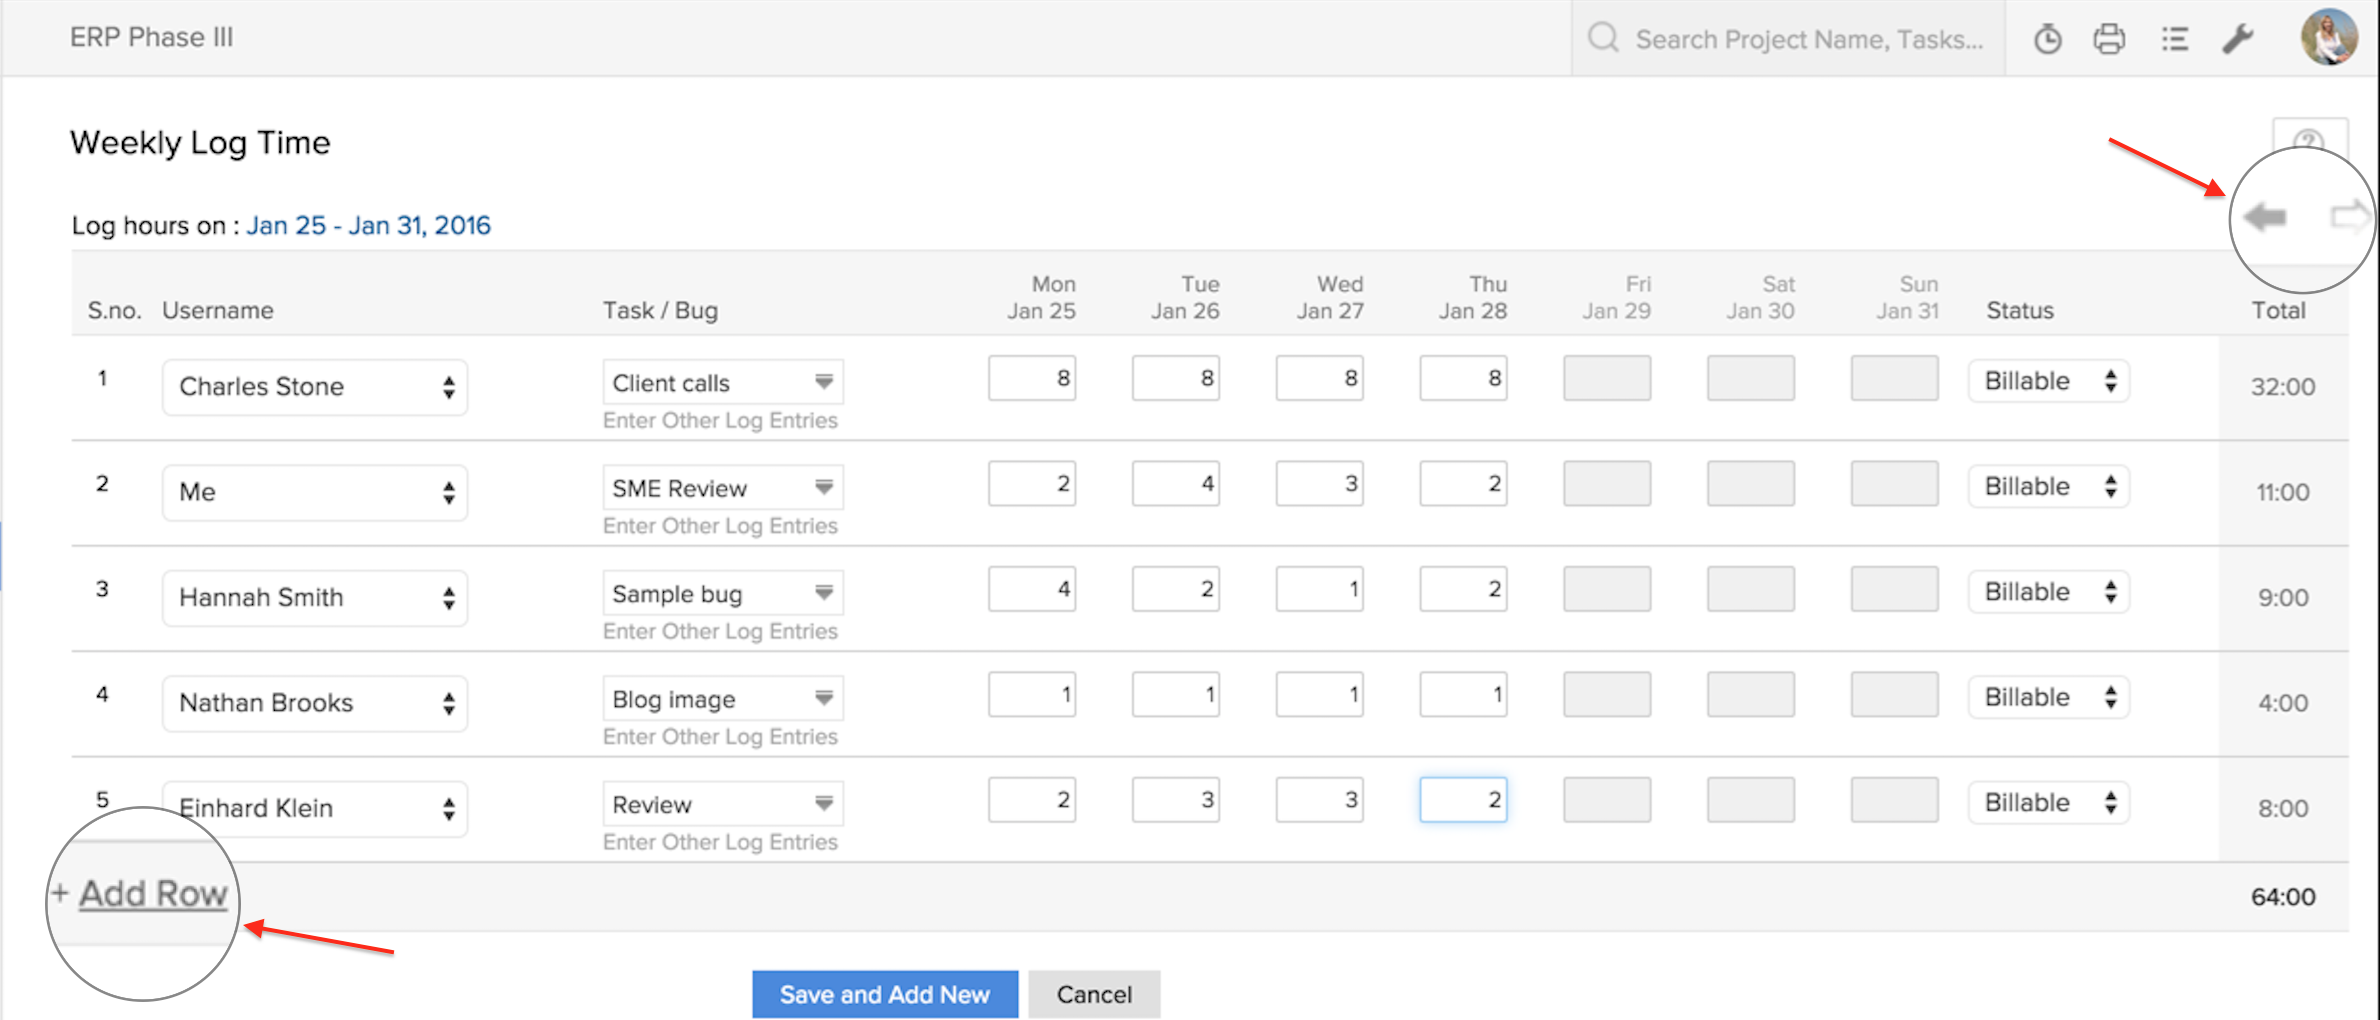
In Timesheet, click the Plus icon at the top right corner, click Weekly Log Time, and then specify the log details. This logs your weekly working hours in the team collaboration timesheet.
Supported Time Entry Formats :
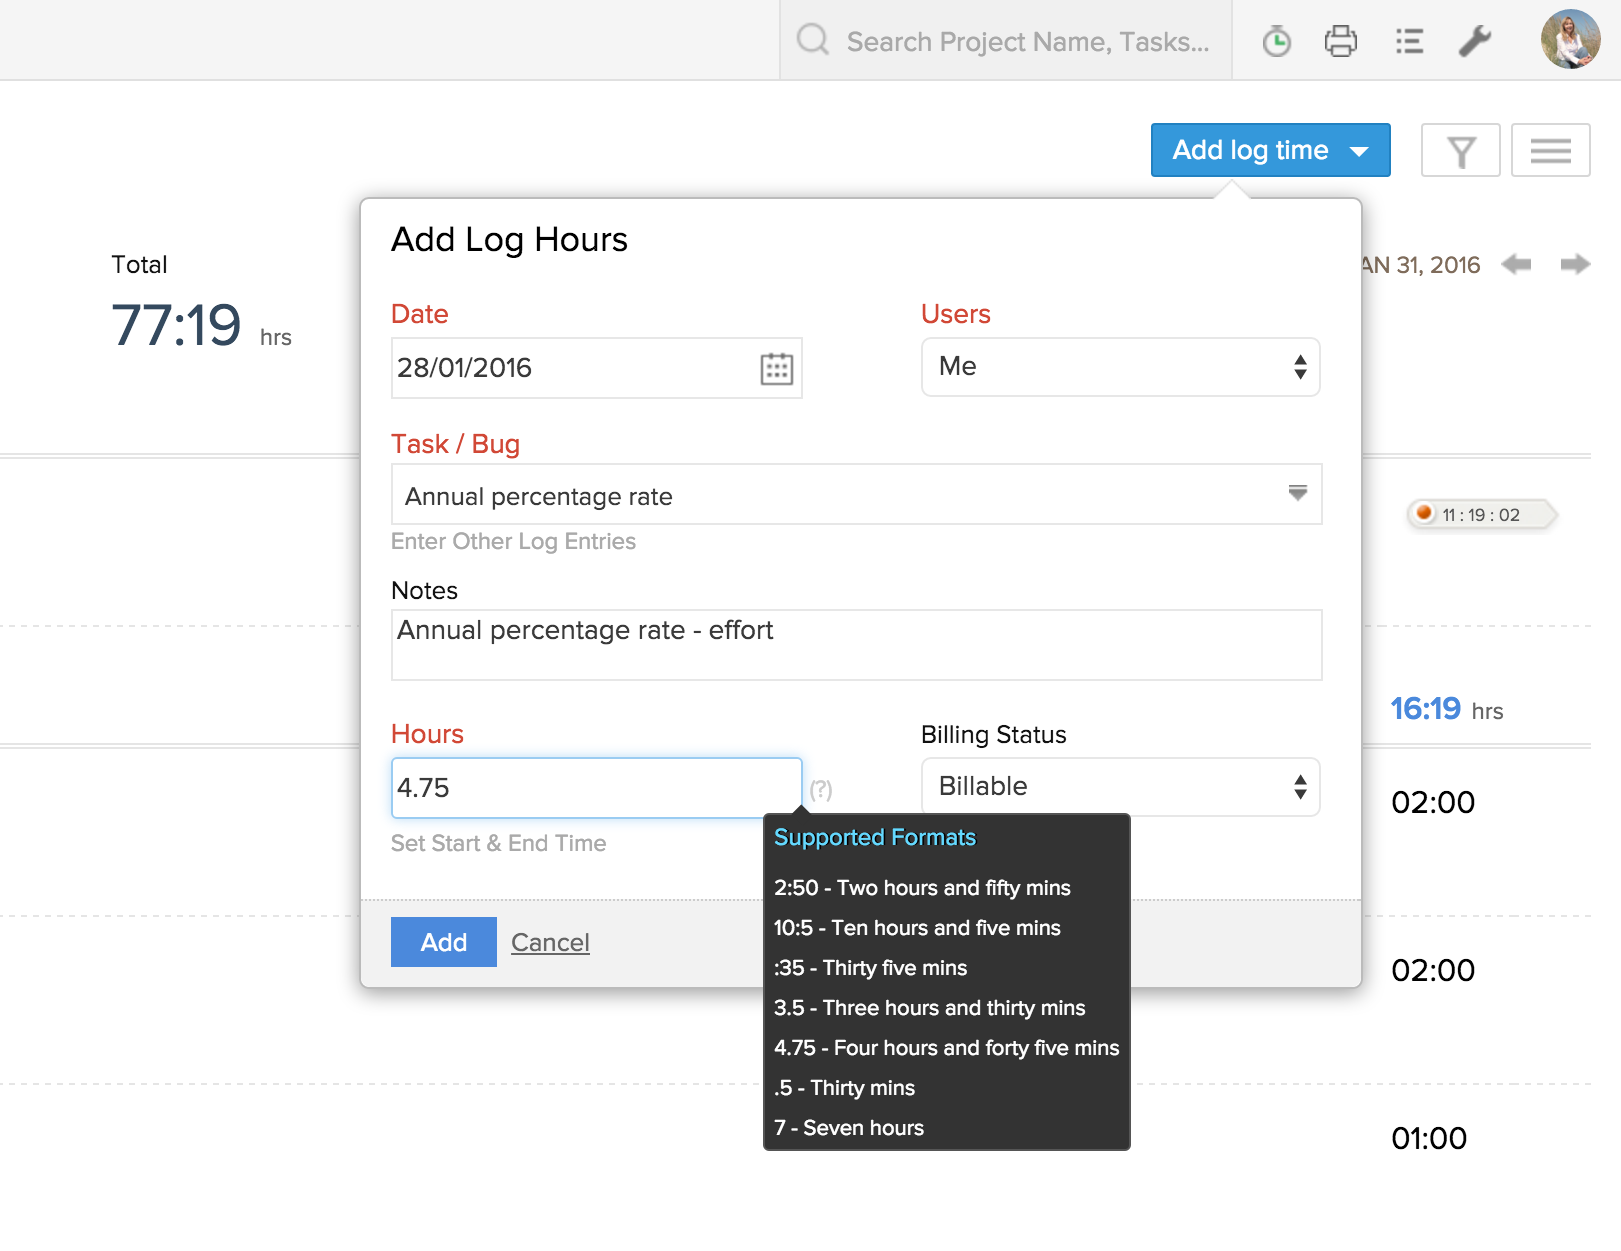
Earlier, the only supported format of time entry was with a colon i,e 3:30. We've now extended that further to include support for more time entry formats. For Example, if you enter 3.75, our timesheets automatically interprets the entered time as 3 hours and 45 minutes.
Edit / delete log entry
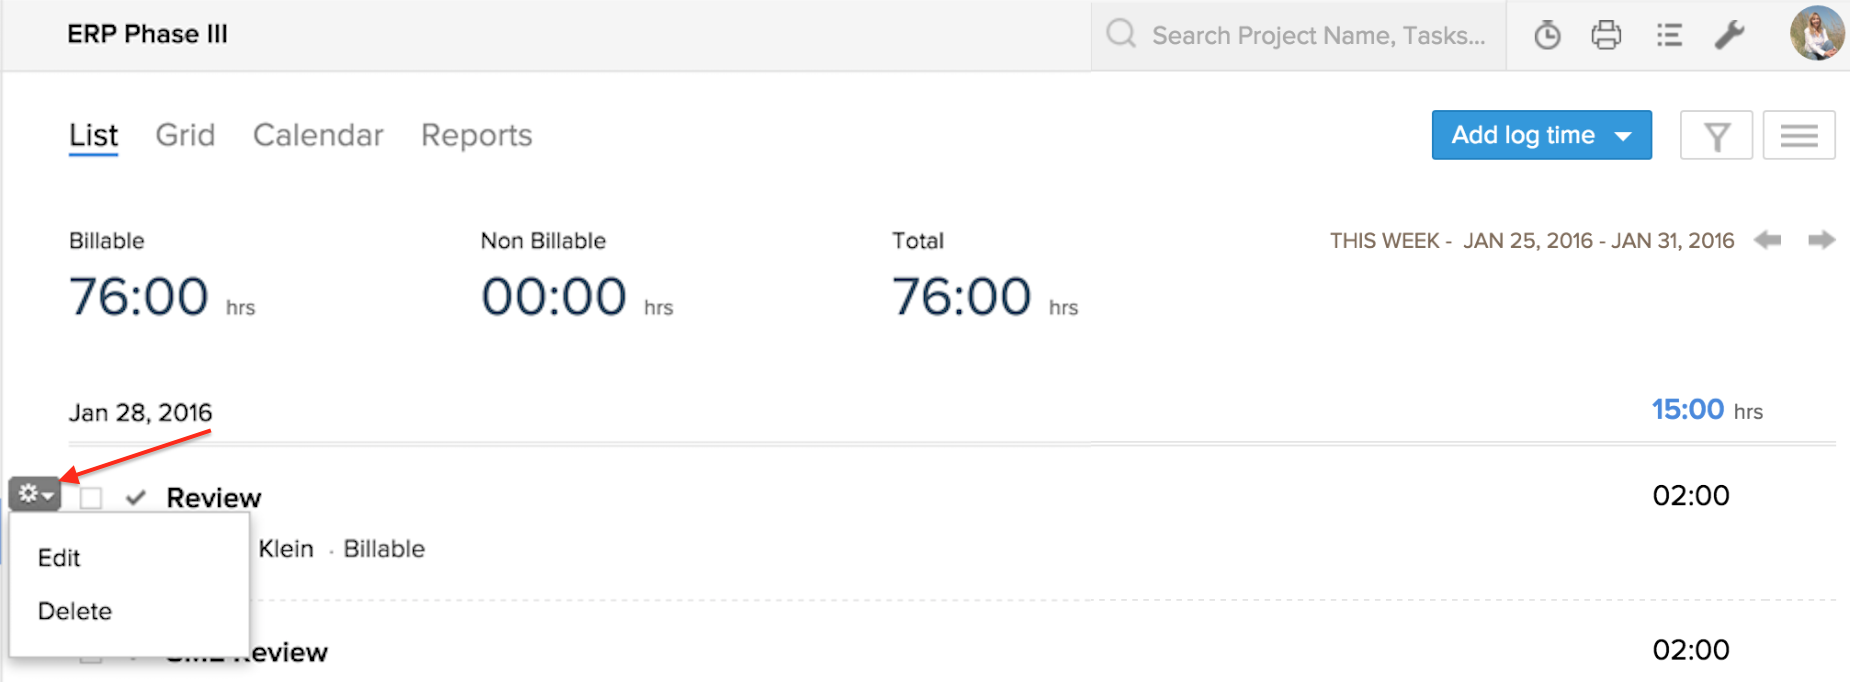
You can edit / delete log hours from the timesheet, anytime you wish. In Timesheet, in the List view, hover the mouse over the required log, click the action menu and then choose to edit or delete the entry.
Timesheet approval process
You can now set an approval process for timesheets, to streamline approvals and billing for the time logs.
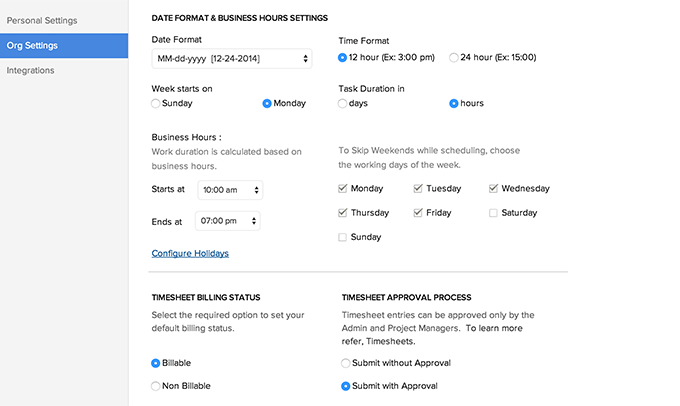
In Home, click Setup at the top right corner next to Notification, click Org Settings and in Portal Configuration, scroll to view the TIMESHEET APPROVAL PROCESS. You can set the timesheet approval process for your timesheet by choosing the option Submit with Approval or Submit without Approval. And timesheet entries can be approved only by the Admin and Project Managers.
Submit without Approval : If you select this option, all your timesheet entries need no approval for billing. They will be billed automatically.
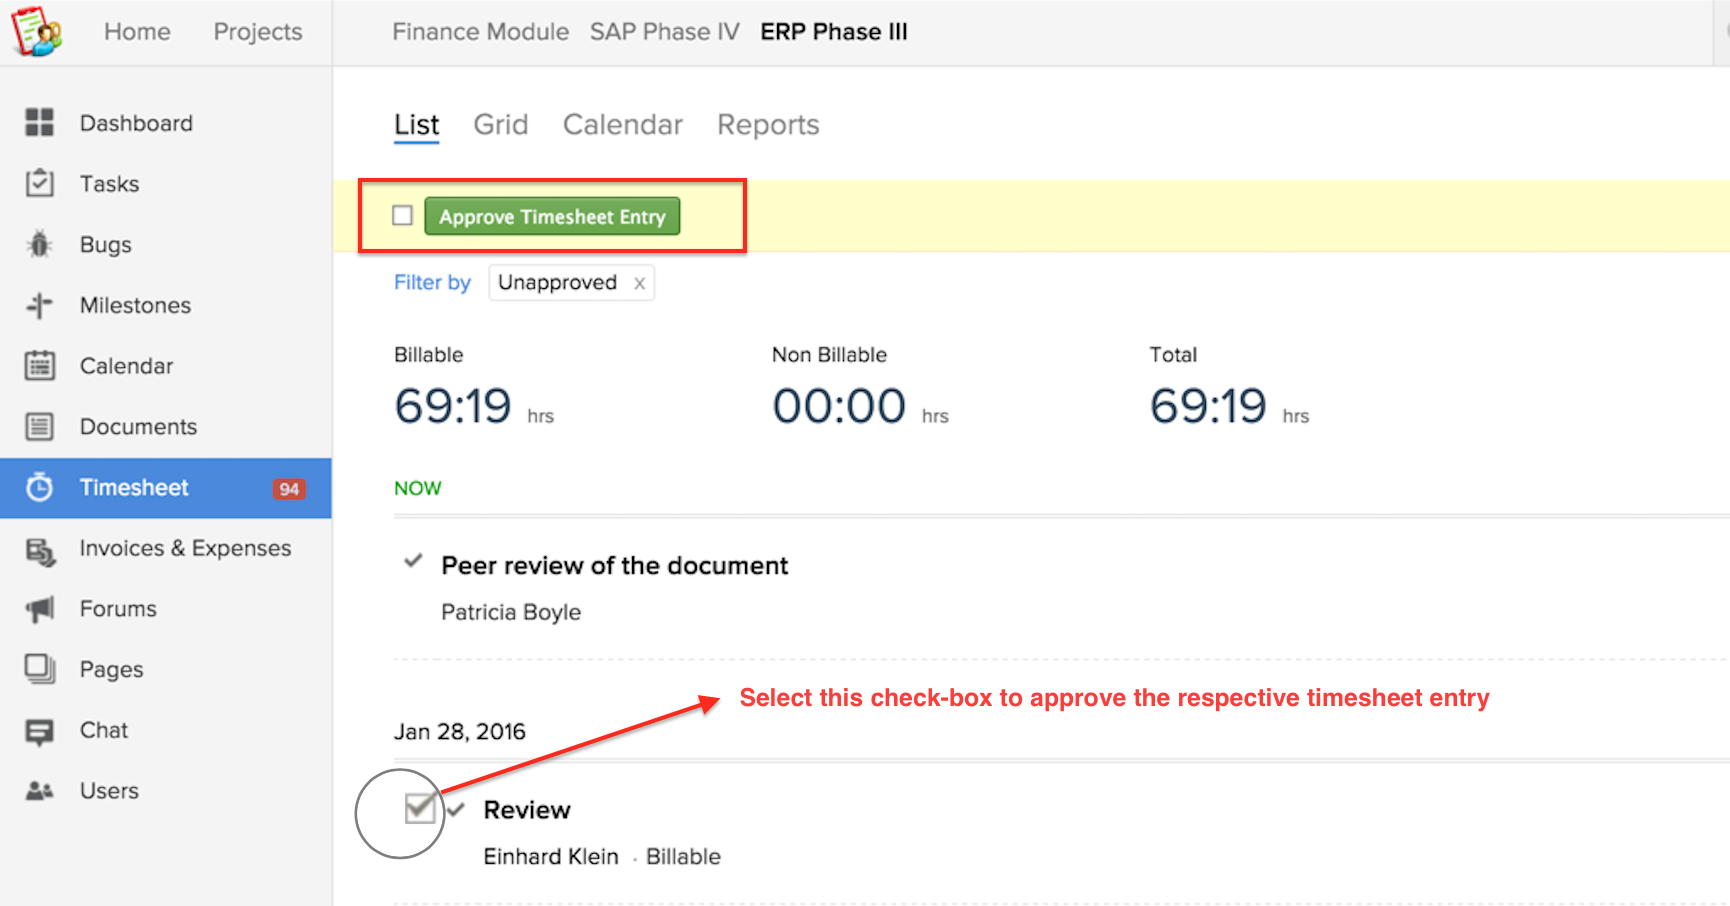
Submit with Approval : If you select this option, the timesheet entries need approval for billing. Unapproved entries are displayed as notifications in red, on the Timesheet icon inside the respective project.
You must select a timesheet entry to enable Approve Timesheet Entry and the entry can be approved as a single item or in bulk.
Unapprove an already approved timesheet entry: If you want to unapprove a timesheet entry that is already approved, uncheck the checkbox to update the entry as unapproved.
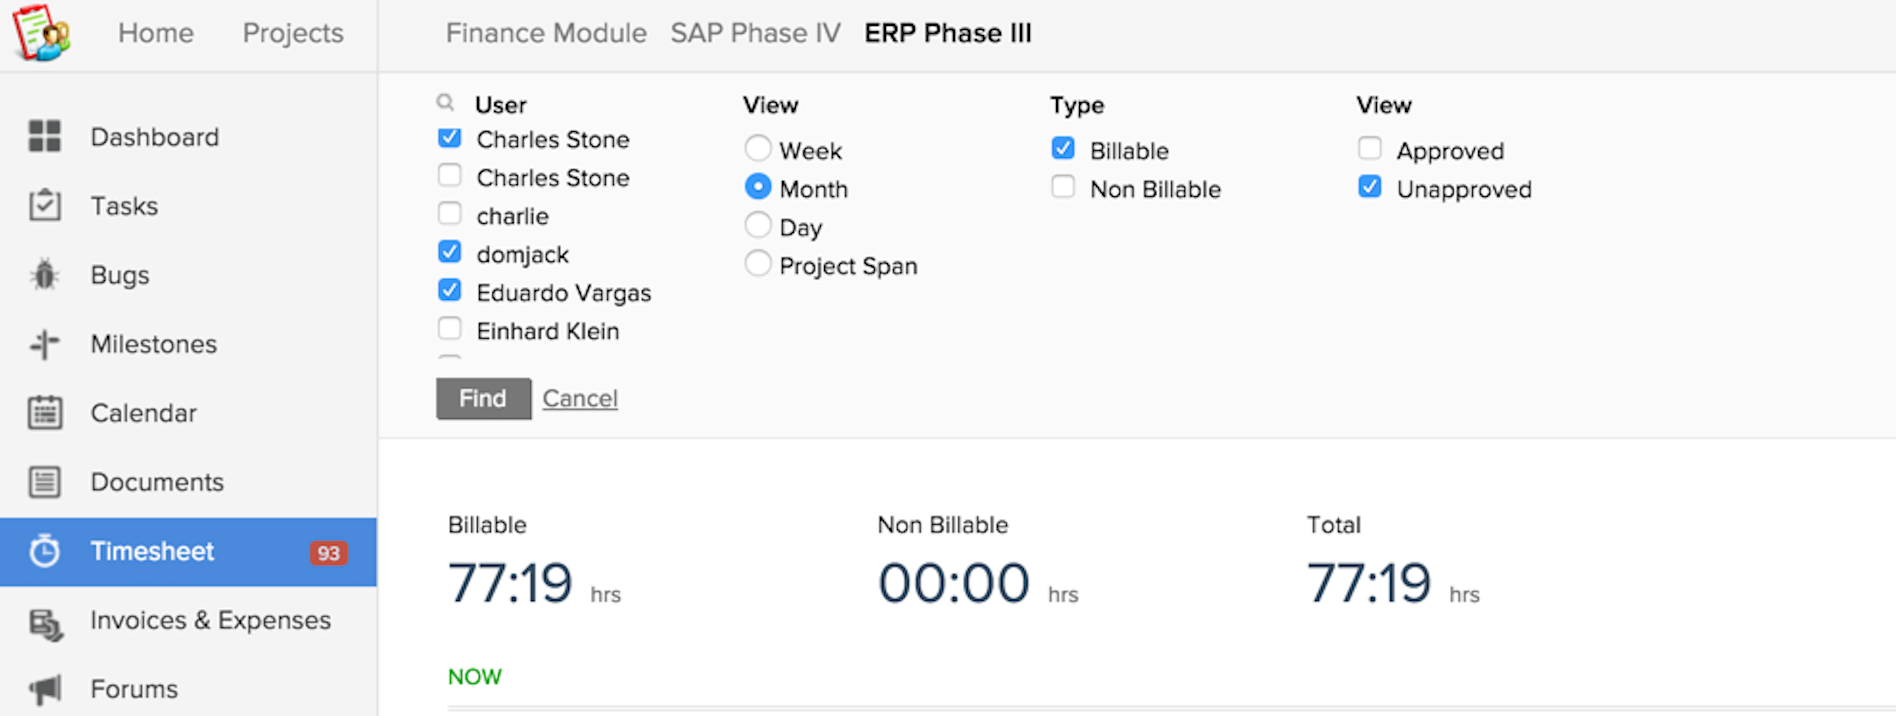
In List view the timesheet entries can be filtered based on their approval status for billing. Also while generating the invoice, only the approved timesheet entries are billed.
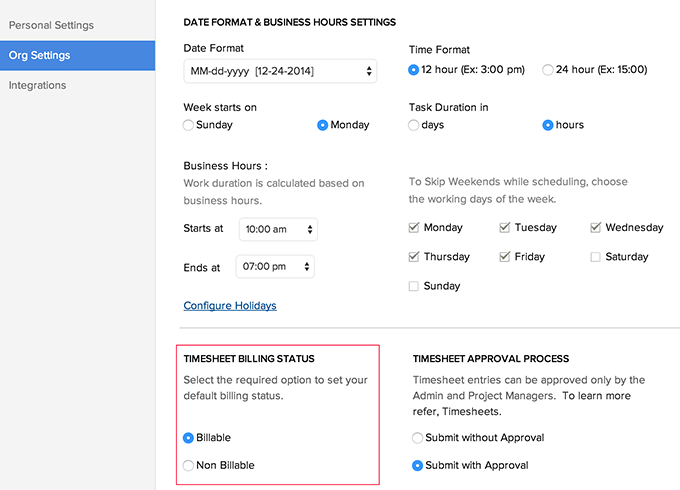
In Home, click Setup at the top right corner next to Notification, click Org Settings and in Portal Configuration, scroll to view the TIMESHEET BILLING STATUS. You can set the default billing status for your timesheet entries by choosing the option Billable or Non Billable in Settings.
And based on the selected option, the default billing status is displayed when you log time in your timesheet.
Add note(s) for log entry
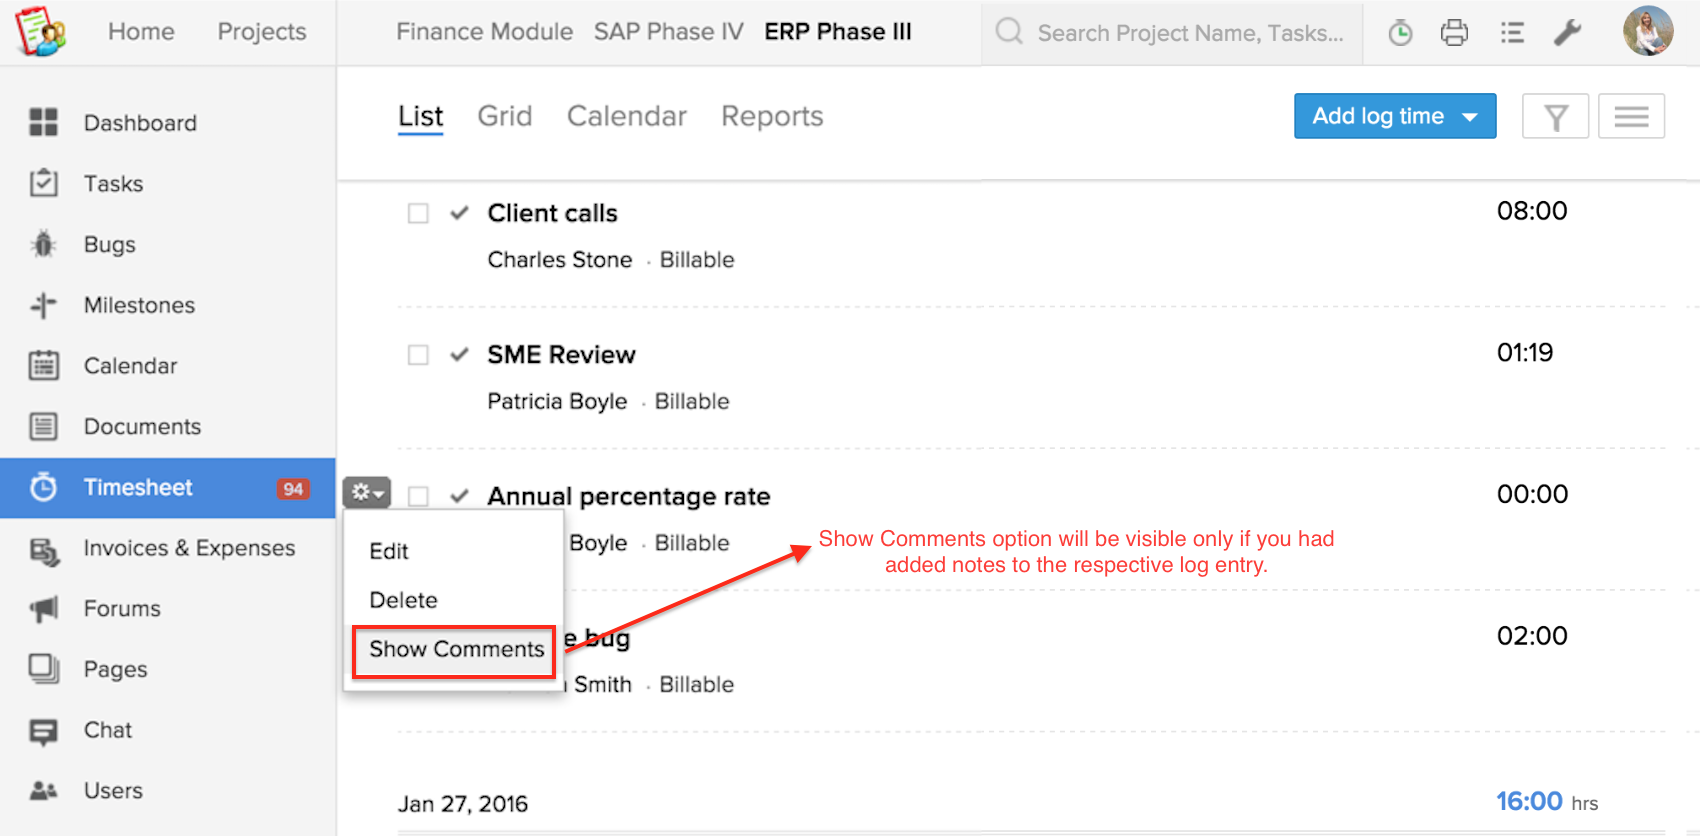
In Timesheet, in the List view, hover the mouse over the required log entry, click the action menu and then click Show Comments. The Show Comments option is enabled only when you add notes to the log entry.
Related Articles
Billing and Payments
Free Edition users can try out the 15-day trial of the other Editions before purchasing. Upgrade to Paid Edition To upgrade from Free to Paid Editions Click Subscription. Check out the CRM Editions and click Upgrade for the corresponding Edition to ...Tracking Summary
The tracking summary line graph displays the overall summary about the visitor tracking in your website. Visits - Count on total visit in the website. Contacted - Count on number of proactive triggers initiated by the agent. Responded - Count on ...Tracking Reports
The Tracking reports section in the Reports module, is a robust dashboard that gives you a feel about everything in the entire live chat tracking operations. You can enter the Tracking Reports module, by clicking “Reports tab” on the left side of ...Visitor Tracking
Integrate Visitor tracking & Live chat to your website/blog and convert website visitors to customers. Initiate proactive chat with visitors, engage effectively and close more deals. Monitor visitors real time and gain more insights about their ...Tracking Analysis
The tracking analysis report lets you view the average number of pages visited by a visitor and the average time spent by the visitor in a page. Page Visits - The average number of pages visited by a visitor. Average Time - The average time spent by ...